
Creating an Amazon Marketplace store can be an extremely profitable venture for your business. However, competition is high on this popular platform. With the many sellers and products already available on Amazon, it can be a real challenge to create a successful store from scratch.
Fortunately, you can build a thriving business on Amazon if you take the time to do it right. You’ll need to understand the inner workings of the platform, including how to create an account, set your prices, and properly list and market your products. When you have a firm grasp on how Amazon works as a sales platform, you can create a storefront and product listings that are optimized for success.
In this comprehensive guide, we’ll introduce you to Amazon Marketplace. Then we’ll walk you through all the steps required to start and run a flourishing ecommerce store on the platform. Let’s take a closer look!
[toc]
Chapter 1: An Introduction to Amazon Marketplace (And the Benefits of Selling There)
As the largest online retailer around, Amazon has made waves with the way it’s changed the ecommerce business. Even without physical locations, Amazon can open many doors for sellers of all types. From the platform’s ease of use to its extreme popularity, there are many reasons you might want to consider selling your products on Amazon Marketplace.
However, before you jump into listing your products, you need to understand the basics of selling on Amazon. Let’s take a look at a few things you’ll need to know before getting started!
What Is the Amazon Marketplace?
The Amazon Marketplace enables small companies and individuals to sell their own products on Amazon’s website. Not only does this make it easy for smaller brands to get their products in front of new customers, but it also creates a huge competitive market for shoppers.
With between 244 million and 304 million active Amazon accounts, selling on Amazon Marketplace can open many new doors for brands who are just getting into ecommerce. Since about 44% of shoppers immediately visit Amazon when they’re interested in making a purchase, this platform is clearly a go-to resource for people all over the world who are looking to buy products.
Why Should You Consider Selling on Amazon Marketplace?
Amazon is quickly taking over the retail world. With a market value larger than its major competitors combined, Amazon has changed the way people think about purchasing. Even without any brick and mortar locations, Amazon perfectly serves the growing base of individuals who prefer to shop online.
With more and more people opting for online orders over physical stores, small business owners need to find a way to stay competitive. Since it can be expensive and challenging to market and maintain your own online store, Amazon Marketplace gives you another, simpler way to reach new audience members.
What’s more, Amazon provides an easy-to-use platform for both sellers and buyers, and adds a trusted name to your shoppers’ experience. Amazon will also fulfill your orders for you, so it takes a significant amount of stress and responsibility off your hands. All you need to do is ship your products to the Amazon warehouse, and they will handle the rest.
Who Can Benefit From Selling on Amazon Marketplace?
The Amazon Marketplace can benefit individuals and companies of all sizes in a variety of ways. Since you can get your Marketplace account up and running with minimal fuss, it can provide you with a great opportunity to expand your audience and attract new customers quickly, no matter your industry or niche.
What’s more, this platform is open to everyone, so you don’t need to be a major brand to create a profile. This gives any company an opportunity to sell on a national and even a global level. For smaller businesses struggling to attract attention with their own websites or physical stores, being able to sell online through Amazon Marketplace can make all the difference. Larger, well-established business can also benefit, but will probably do better to focus on their own ecommerce sites.
However, it is important to keep in mind that simply listing your products on this platform probably won’t be enough to bring in significant new business. If you truly want to attract new customers and increase sales, you’ll need to be sure you’re setting up your profile correctly and optimizing your product pages (we’ll discuss this in more detail later in this guide).
We also recommend that Amazon Marketplace should be used in addition to your own website. While some companies do get the majority of their sales from Amazon, having your own online store or company site can improve your branding and help you create long-term customers and clients. It’s best to use the two resources together to attract attention, gain new customers, and convert them into consistent, repeat buyers.
Conclusion
The Amazon Marketplace can be a great opportunity to get your products in front of a massive audience. When used right, this platform can bring you more customers, increase your sales, and improve your brand’s visibility.
In the next chapter, we’ll take a look at how you can get started with your Amazon Marketplace account!
Chapter 2: How to Get Started with Amazon Marketplace (In 3 Steps)
Establishing your Amazon Marketplace account is the first stage of creating a successful sales strategy for the platform. If you don’t set your page up correctly, you can run into issues that can hurt your sales (and be challenging to fix) further down the line.
On the other hand, getting started the right way can help you lay a solid foundation that all but ensures future success. Let’s take a look at the steps you’ll need to follow to get your account up and running!
Step 1: Choose Your Seller Category
To create your Amazon Marketplace account through the Seller Central portal, you’ll first need to determine your seller category. There are two you can choose from: Individual and Professional:
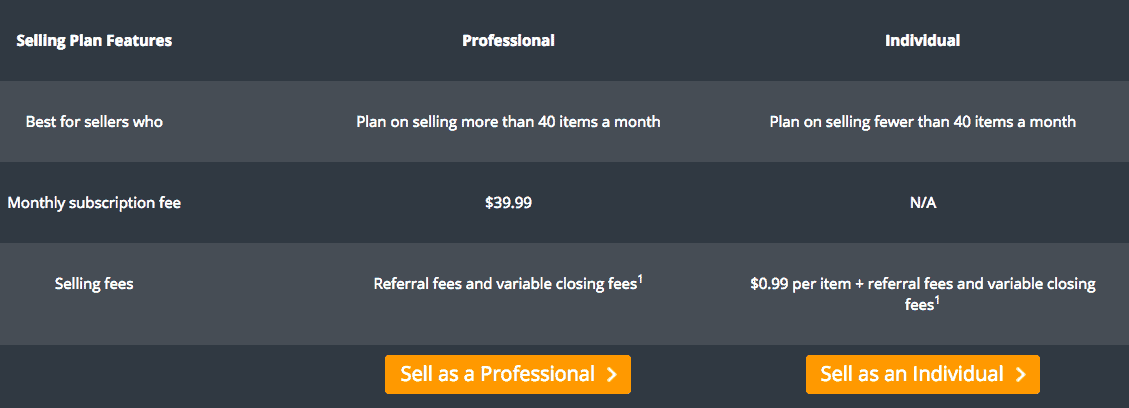
Before you opt for one or the other, you should consider this choice carefully. As a Professional, you’ll pay $39.99 per month for your Amazon Marketplace account, plus any additional selling fees you may be subject to. Individual accounts will pay $0.99 per sale, meaning you may end up paying more for an Individual account if you plan to sell more than 40 items each month. There are also some restrictions on the products you can sell through an Individual account.
Most businesses will probably want to sign up for a Professional account, which ensures that you won’t take on too many extra fees when selling large volumes of products.
Step 2: Enter Your Company Information
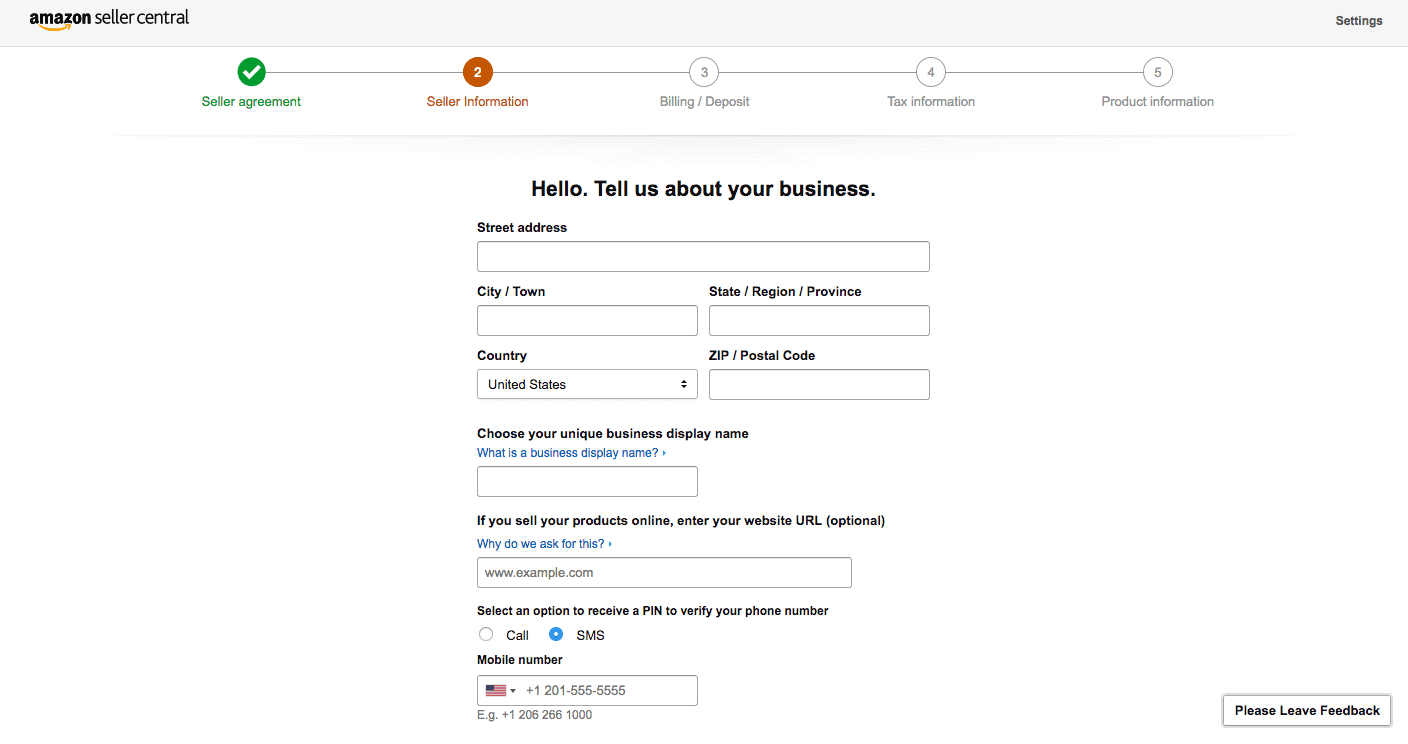
After you’ve determined which seller category is right for you, you’ll need to enter your company information. The process for signing up as a Professional or Individual is largely the same, until you get to the billing section of your account registration.
For the most part, this step is self-explanatory. As you can see from the example above, you’ll be asked for basic information about you and your brand, such as your company address, business display name, website URL, and phone number.
As you move through the registration process, you’ll also be asked for tax information. This will include either your personal Social Security Number, or the tax identification number issued to your company by the government. While Amazon will not file your taxes for you, inputting this information will enable them to properly report the revenue you’ve collected from selling on their site.
To make registration easier, gather all the necessary information before you begin setting up your profile. Having it on hand will make the sign-up process go more smoothly.
Step 3: Establish Your Seller Profile
Now that you’ve entered the information needed to create your Amazon Marketplace account, you’re ready to build your seller profile. Since this is the page your audience will see when they view your products, you want to be sure it’s effective.
Your seller profile should be a complete representation of your company and your brand. Consider using it to feature your company’s logo, slogan, and other important details. This can help you improve your image and create a recognizable identity, both on and off Amazon. Plus, it can increase brand loyalty and keep happy customers returning for more.
You’ll also want to include a well-written description of your company and brand, under the About Seller section of your profile. As the first impression many potential customers will have of your business, you need a profile that attracts attention and creates a bond with the shopper. The stronger your profile, the better your chances of making a sale.
You should also include return and refund policies within your seller profile, if applicable. Clearly laying out the steps an unhappy customer would need to follow can help avoid confusion, promote trust, and show that you’re willing to take the appropriate steps to rectify negative situations.
Finally, keep in mind that you can update all of this information whenever necessary, through the Settings section of your Amazon account.
Conclusion
If you set up your Amazon Marketplace account the correct way, you can minimize the number of problems you run into further down the road. Follow the three steps listed above to ensure that you’re creating your account and profile effectively.
In the next chapter, we will take a look at how you can further build your profile and create pages for your products!
Chapter 3: A Step-By-Step Guide to Setting Up Your Amazon Products Pages
Your seller profile isn’t the only thing you need to set up correctly when starting out on Amazon. Since your customers will be engaging directly with your product pages, you need to be sure they’re filled out appropriately. A thoughtfully completed product page will include everything your customers might want to know about the item.
Let’s take a look at how to properly fill out your product pages to increase your chances of landing a sale!
Step 1: Create a Product Listing and Classify the Product
To get started, you’ll need to create a listing for your product:
 This can easily be done by clicking the Inventory button on your Amazon Seller Central page, then selecting Add a Product. If this is a brand-new item, you’ll want to choose Create a New Product Listing next. However, you can also search through Amazon’s catalog to find out if a listing has already been created for that product, which will save you some time.
Once the listing is created, you’ll need to enter a product classification. Amazon has a number of potential categories to choose from, and you can find the right one by searching for a relevant keyword. The more detailed your category is, the better the chance people will find it.
Step 2: Provide Product Information and Upload Images
Next, you’ll be prompted to describe your product in a way the Amazon Marketplace software can understand. This means providing vital information such as brand name, manufacturer, and package quantity:
You’ll need to fill in a series of fields, although you can ignore those that aren’t relevant to your product. If the item has multiple options, such as colors or sizes, you can describe these under the Variations tab.
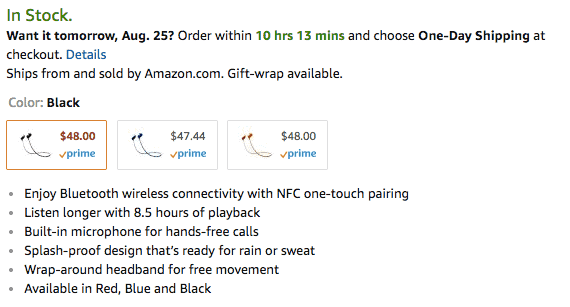
After that, you’re ready to upload images of your product. Simply select the images you’d like to include, determine which order they should be presented in, and save them to the listing. While only one is required, having multiple pictures of different angles and variations can improve your chances of getting a sale:
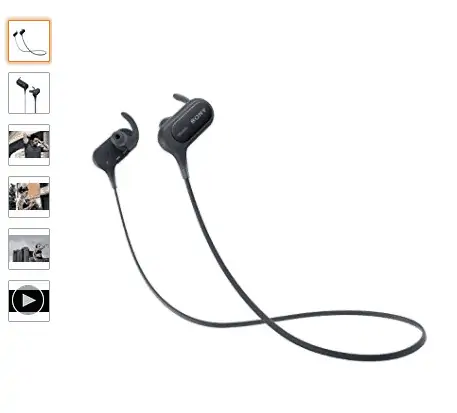
Make sure each image you upload is high-quality and professional, but also meets the guidelines set out by Amazon.
Step 3: Enter a Product Description
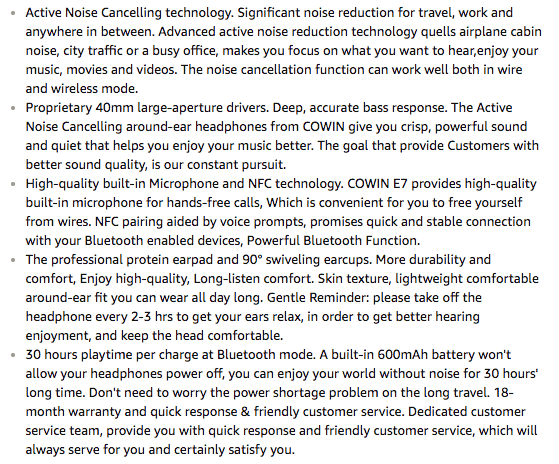
While the last step provided back-end information to help classify your product, your key product features and product description directly inform customers about the item. The key product features will appear as bullet points near the top of your product page. To ensure you’re optimizing this section, try to include some keywords within these bullet points, wherever they feel natural:
The product description, on the other hand, will appear in paragraph form:
 You’ll have a limit of 2,000 characters, so keep your description brief, direct, and concise. Make sure to cover the most important information, but avoid overwhelming your audience with unnecessary text.
Step 4: Select Your Keywords
We’re almost done, but there’s one more task to take care of. Just as on your website, you’ll want to optimize your product pages using keywords. This means choosing terms you think customers will search when looking for a product like yours.
Your keywords will need to be between 1 and 100 characters, and should accurately represent what real customers might type into the search bar when looking for your product. If you try to get too creative, you’ll run the risk of never being found. However, you don’t want to use terms that are too generic, or you might get lost in a sea of similar products.
In addition to your own keywords, you’ll be able to select specific terms suggested by Amazon. Use these phrases to describe important details about your items, such as category, intended use, target audience, and other attributes.
Conclusion
The more thoroughly your product pages are filled out, the easier it will be to convince shoppers to make a purchase. Following the above four steps will ensure that you’re covering all your bases and creating high-quality listings.
In the next chapter, we will cover some common mistakes you might make with your Amazon account that could cost you business!
Chapter 4: 3 Common Mistakes Amazon Sellers Make (And How to Avoid Them)
While setting up your Amazon Marketplace account may be easy, selling on it isn’t so simple. When you’re trying to attract new customers, sell products, and grow a profitable online business, you need to avoid careless mistakes as much as possible — especially those that might cut into your profits.
To ensure the success of your Amazon sales, here are three of the most common mistakes Amazon sellers make and what you can do to avoid them!
1. Forgetting to Include Sales Tax
When it comes to selling online, sales tax can be confusing. Each state has unique sales tax laws, so you need to know who you’re selling to and whether or not sales tax is applicable for that buyer. If you forget to collect sales tax from a customer, you’ll need to pay for it out of your own pocket.
Forgetting to include sales tax can become expensive quickly. If you sell too many products without collecting sales tax from your customers, you may be in for a rude awakening when the bill is due. Fortunately, Amazon can help you collect sales tax, although they do charge for the service. Outsourcing this task can eliminate some of the pressure on you, and ensure that you never overextend yourself.
To begin collecting sales tax through Amazon, you’ll want to fill out your Tax Settings as soon as possible. Begin by logging into your Amazon Seller Central account, then clicking on Settings. Next, select Tax Settings, and then choose View/Edit Your Tax Collection. From there, you can fill out your information and begin collecting sales tax automatically.
2. Not Responding Promptly to Customer Inquiries
It’s common for potential customers to have questions or concerns about your products. Whether they’re interested in learning more about the product or have a specific request, your customer service responsibilities begin the moment they send you an inquiry. Amazon is popular among shoppers largely because it offers so many different options in one place. If you don’t answer customer inquiries quickly, they’re likely to move on to a similar seller.
There are also penalties on Amazon if you don’t respond to inquiries fast enough. Amazon gives sellers 24 hours to provide a response, including on holidays and weekends. If the question is not answered within this time frame, Amazon will be notified. Once you’ve missed too many inquiries, your account will be suspended.
You will be notified of new inquiries through your primary email. Therefore, you may want to schedule time at least once a day to check your inbox, making it a habit so you never miss crucial messages.
3. Being Careless While Fulfilling Orders
Whenever a customer makes a purchase, they’ll to want to receive exactly what they ordered. If you’re sending them the wrong product (or one that’s broken or has some other issue), they’re likely to get annoyed. Plus, carelessly fulfilling your Amazon orders can harm your online sales reputation. If an unhappy customer gets online to leave you a poor review, other shoppers may think twice before purchasing from you.
There are a number of fulfillment mistakes that can happen if you aren’t paying attention, from shipping the wrong product to realizing you’re out of inventory after someone has already placed an order. Closely monitoring your inventory and sales is crucial for success on the Amazon Marketplace. While issues may still occur from time to time, you’ll want to do everything possible to mimimize their frequency.
If fulfillment is giving you problems or you don’t have time to manage it yourself, you can always take advantage of the Fulfillment by Amazon (FBA) program. FBA members send their products to an Amazon fulfillment center, where packing, shipping, and customer service is all taken care of by Amazon employees. This of course comes at an additional cost, but enables you to scale your business quickly and sell more products.
Conclusion
Don’t allow careless mistakes to prevent you from being successful on Amazon. Keep these three mistakes in mind as you get started, so you know how to avoid stunting your online sales growth.
In the next chapter, we’ll take a look at how you can optimize your Amazon Marketplace account to attract more customers!
Chapter 5: Optimizing Your Amazon Marketplace Account, Part 1 (Keyword Research)
Selling on Amazon gives you the opportunity to reach millions of shoppers worldwide. However, since Amazon is the largest retailer in the world, you’re going to have some competition. Regardless of the industry you’re in and what products you’re selling, you must properly optimize your product pages if you want to improve your chances of getting a sale.
Keyword research is an important part of optimizing your account. Let’s take a look at how you can find the right keywords to get more eyes on your products!
Why Is Keyword Research Important?

Keywords are the words or phrases that shoppers will type into the search bar when they’re looking to make an Amazon purchase. Relevant products will then be suggested, based on that input. In order to get your own products to appear at the top of these shoppers’ results lists, you’ll need to target the right keywords.
To find out what keywords to target, you’ll want to begin with keyword research. In other words, you need to attempt to understand the searching behaviors of your target audience. Of course, each shopper will search somewhat differently, so you must approach keyword research from a variety of angles. Some consumers will know the exact product they’re looking for, after all, while others will only know the problem they’re trying to solve.
How to Conduct Keyword Research
If you have a website, there’s a good chance you’ve already done some keyword research to improve its SEO. While the keyword research process for Amazon is similar, it isn’t exactly the same. When shoppers visit Amazon to make a purchase, most will already have some idea of what product they’d like to buy. They’re typically looking for specific items, so you want to ensure you’re including the right information in your keywords.
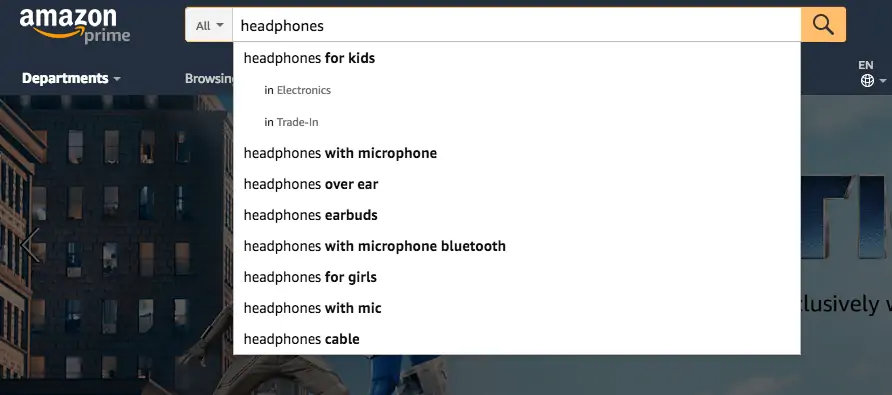
To begin your keyword research, take a look at your competitors. If there are other sellers with the same or similar products, find out what keywords they’re targeting by checking out their headlines and descriptions. Look for terms or phrases that are used frequently, and consider whether or not those are strong keywords for you to target as well. You can also benefit from experimenting with Amazon’s auto-fill feature, as shown in the example below. This will give you an idea of popular searches you may want to target:
Finally, it can be smart to invest in keyword tools specific to Amazon. Software such as Sonar can help you evaluate different keywords, and determine which ones will bring you the highest return. Tools like these are perfect if you don’t have the time or expertise to do in-depth research yourself.
Tips for Properly Placing Your Keywords
After you’ve selected the perfect keywords, you’ll need to add them to the right places. Just as with traditional SEO, Amazon crawlers will look in specific locations for information. For the most part, they’ll focus on your product’s title and description.
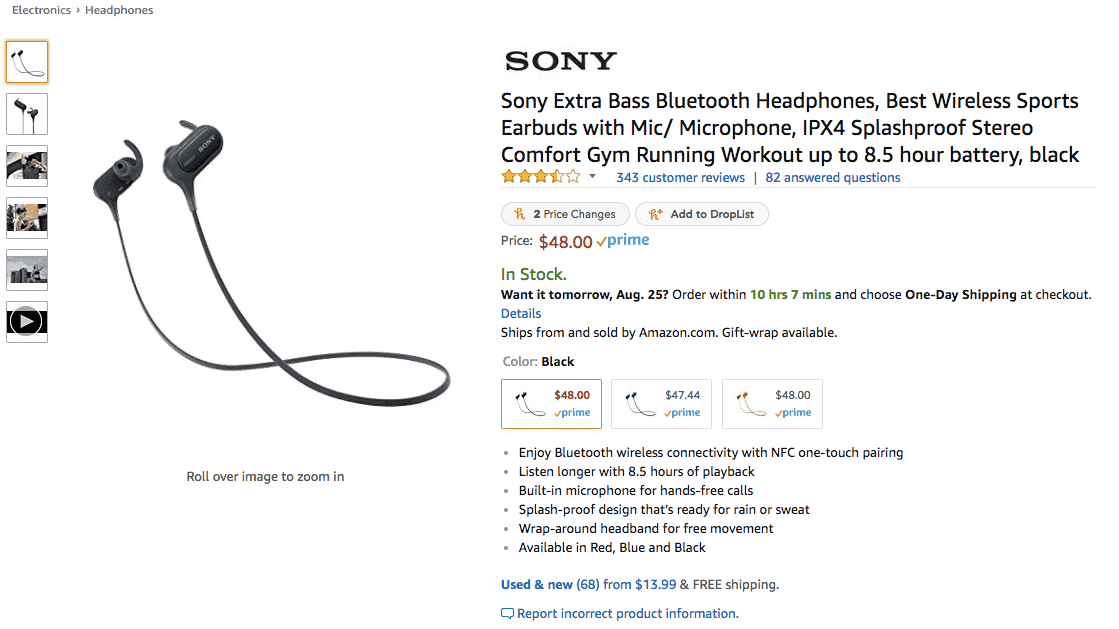
Your title will be the first thing that both shoppers and crawlers will see when browsing through potential items. In order to attract attention, you want to include as much specific detail as possible without becoming too overwhelming. Consider including elements such as product names, uses, and ingredients within both the title and description. This example shows a solid balance between detail and brevity:

Amazon also has ‘hidden keywords’, which are generic keywords that can help shoppers find you. However, they must be accurate and specific to the product. Hidden keywords can encompass abbreviations, nicknames, acronyms, details about the product, alternative names for the item, and more. While they aren’t required, they can be helpful and are worth spending some time on. If you do decide to use hidden keywords for your products, make sure to follow Amazon’s best practices.
Conclusion
Optimizing your account and product pages is important for ensuring that shoppers can find your listings on Amazon. To conduct proper keyword research, you’ll need to take the time to understand how your audience is shopping on Amazon, and find out what they’re typing into the search bar.
Keywords aren’t the only important part of Amazon optimization, however. In the next chapter, we’ll take a look at the other on-page factors you’ll want to include in your optimization process.
Chapter 6: Optimizing Your Amazon Marketplace Account, Part 2 (On-Page SEO)
Doing proper keyword research is just the start of creating an optimized Amazon Marketplace account. Once you’ve selected the right keywords for your products, you’ll need to properly place them for maximum attention.
Just like traditional SEO, where you place your keywords will determine how you rank in lists of search results. Let’s take a look at the most important places for your keywords to appear.
What Is On-Page Search Engine Optimization (SEO)?
Search Engine Optimization (SEO) is a process that involves enhancing pages and content so they rank higher in searches on sites like Google. A complete SEO strategy involves both off-page elements, such as the effects of your platform and hosting service, and on-page elements like optimized headlines and proper keyword placement.
By placing keywords, phrases, and other text in the right areas, you can increase your chances of showing up in relevant searches, which in turn will help your products attract more attention. On the Amazon Marketplace, a properly optimized page can put you ahead of your competition and help you sell more products.
Where to Place Your Amazon Keywords (3 Key Elements)
A well-optimized product page is largely the result of placing your keywords appropriately. Let’s take a look at the three most important areas of your Amazon product pages to optimize.
1. Product Title
The title of your product is a crucial part of your listing. Not only is it the first thing Amazon search crawlers will see when they scan your page, but it is also the first factor shoppers will use to determine if a product is right for them.
When creating your product title, you want to include as many relevant details as possible. This includes elements like the brand name, the product type, and the color, size, and quantity of the product. This is a strong example of a well-optimized product title:
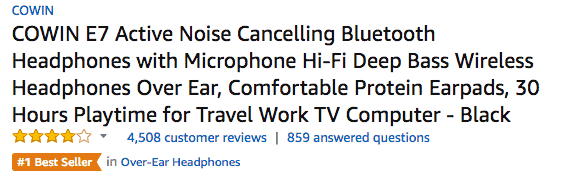
For best effect, your titles should be between 115 and 144 characters. Also, to improve your chances of ranking highly, you’ll want to place your most relevant keywords early in the title.
2. Product Bullet Points
After the product’s title, its bullet points are the next most important element. These bullets provide a brief overview of your product, giving customers a closer look at what you can offer them. They also provide you with an additional opportunity to feature your keywords.
Your product bullets should focus on outlining the features and benefits of the item being sold. This means you should try to include keywords targeted at individuals who are looking to solve a particular problem, but may not know what product they actually need. Here is an example of optimized product bullet points:
Each bullet point should be 100 characters or less, so they’ll need to be direct and to the point. Keep in mind that you can only have up to five bullet points, so think carefully about the details you want to include. Place the product’s best attributes or features within the first bullet to maximize your sales.
3. Product Description
Your product’s description is another opportunity for you to use keywords and engage with your audience. Similar to the product bullet points, the description will give you more of an opportunity to address key features, benefits, and attributes of your product.
Product descriptions are longer than individual bullet points, so you can tell a bit of story about the product you’re selling. However, you’ll still want to be mindful of how you’re optimizing this content. Your product description should include relevant keywords, but they should be placed as naturally as possible, such as in this example:
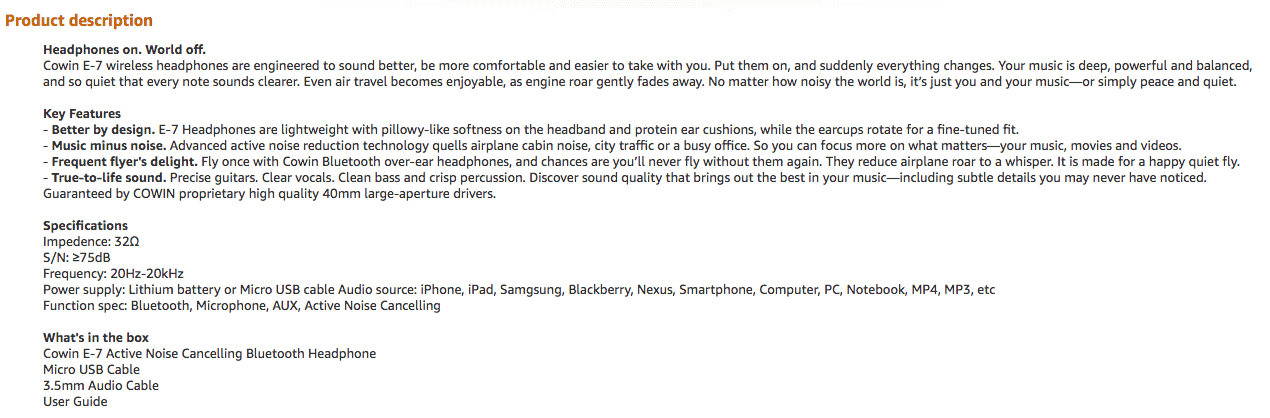
When writing product descriptions, think about who your ideal shoppers are and what kind of content they may be looking for. You will have up to 2000 characters, but only use what is necessary. You may want to discuss the brand’s history, how the product can be used, and so on.
Conclusion
A fully optimized Amazon page can attract more attention and convert more customers. When you include the right keywords in the ideal places, you’ll see a steady stream of new shoppers coming to your page each day.
However, marketing isn’t the only part of closing an Amazon sale. You also want to ensure that your pricing strategy is competitive. In the next chapter, we’ll provide tips on how you can properly price your products.
Chapter 7: How to Set Your Amazon Marketplace Sales Prices (3 Key Tips)
Many Amazon shoppers turn to the marketplace because of the vast number of product choices it offers. When they’re looking to get the best deal possible, they’re going to shop around for the cheapest option. If you’re pricing your Amazon products too high, you may be missing out on sales. However, price them too low and you may struggle to keep your business running.
Pricing strategy is an important part of maintaining a successful Amazon Marketplace business. Let’s check out what you can do to set your product prices effectively!
1. Know Your Personal Costs and Fees
When you’re setting your prices, you need to understand the costs and fees associated with creating, selling, and distributing your product. Knowing how much it is going to cost you to create the product and get it in the hands of your customers gives you a baseline amount that you know you can’t price the product under. This number can also be used to better understand your profit margins.
To find your personal costs and fees, first calculate your production costs. Then account for the Amazon fees you’ll acquire as a seller. This includes your membership fees and taxes, as well as any additional costs you may pay for distribution, fulfillment, and shipping. Add up all these numbers to find your total investment.
At an absolute minimum, you never want your product’s sales price to go under this number. However, you also need to maintain a sizeable profit margin, so you can grow your business. On Amazon, most sellers try to price each item at about three times what it cost them to acquire it before Amazon takes its fees.
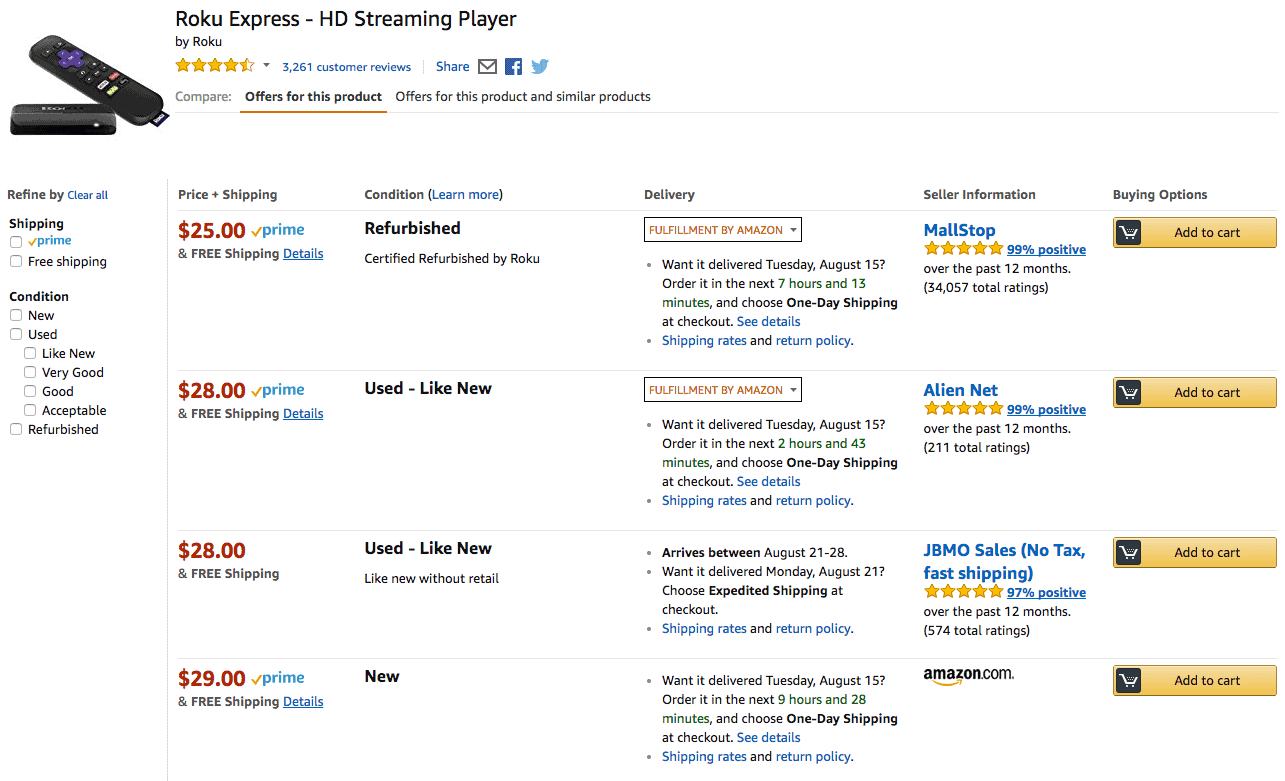
2. Evaluate Your Competitors’ Pricing
When an Amazon shopper goes online to make a purchase, they’re met with dozens of other sellers offering the same or similar products. This means competition is high for Amazon sellers, and you need to stand out if you want buyers to choose your products. You need to set your prices strategically, considering how much your competition is offering and pricing accordingly.
Competitors’ pricing is especially important to consider if you’re not selling a unique product. If a customer can get the same item for a cheaper price, they’re likely to go with the best offer. If you’re selling your own items, you can price a bit more aggressively. However, you still need to consider the cost of similar alternatives. When setting your prices, a good rule of thumb is to stay within 20% of your competition.
3. Consider Sales and Price Cuts
When setting your prices, you ultimately want to consider your profit margins. Based on your total costs and expenses, you need to sell products for an amount that offers you enough profit to keep your business running (and also put some cash in your pocket). However, when you’re just starting out, your primary focus will often be on bringing attention to your product rather than to your competitors.
Amazon prioritizes products based on the amount of attention they’re getting from shoppers. Items that are frequently purchased will be closer to the top of a results list, while items that gain less attention are pushed further down the list. To boost your ranking, you want to attract a sizable number of buyers in a short amount of time.
Running a sale or a promotion is a great way to introduce a new product to the Amazon Marketplace. When you reduce your prices to be a bit lower than your competition, shoppers will be more inclined to purchase from you. This can signal to Amazon that customers want your product, and push it futher up the results lists. When you’ve reached a top slot, you can raise your prices to be closer to what your competition is offering.
Conclusion
When you find that sweet spot with your pricing, you can keep a consistent stream of sales coming to your business. Don’t be afraid to try out different pricing strategies to determine the right asking amount for your Amazon Marketplace products.
In the next chapter, we’ll talk about how you can improve your Amazon Marketplace account with a Shopify integration!
Chapter 8: A Step-By-Step Guide to Integrating Shopify With Your Amazon Marketplace Store
For serious online sellers, Shopify can be an important part of attracting customers and selling products. As an all-in-one software provider, Shopify enables users to create online stores, market their products, and start building a brand for their company.
However, running separate Shopify and Amazon Marketplace accounts can be a lot to juggle. To improve your online sales and simplify your workflow, you can integrate Shopify with your Amazon Marketplace store. Let’s check out how!
An Introduction to Shopify and Its Benefits
Shopify is an e-commerce platform that helps companies sell more efficiently online. It guides sellers through the entire process of setting up a website, monitoring their inventory, and promoting it on different channels, such as Pinterest and Amazon. Shopify can also take care of processing credit card payments and shipping products to customers.
Shopify provides an all-in-one tool for online retailers, making it a go-to source for many sellers. What’s more, it is easy to use and completely customizable, meaning retailers can create a site unique to their needs while still maintaining control. For these reasons, it’s worth syncing your Amazon Marketplace and Shopify accounts if you use both. In addition to the above benefits, you’ll also be able to target shoppers through a multi-channel approach.
How to Integrate Shopify With Your Amazon Marketplace Store (In 4 Steps)
Integrating your Shopify account into your Amazon Marketplace store is easy. Let’s check out how you can do it with four simple steps.
Step 1: Ensure That Your Amazon Store Meets Shopify Requirements
Before you get started, it’s important to note that not all Shopify accounts will offer full integration. You can only create new product listings for Amazon within Shopify if you’re in the Clothing and Accessories category. However, you can still link existing Amazon products to your Shopify account, to take advantage of its other benefits.
Other requirements include that you must list your products in U.S. dollars, and you must fulfill and ship your orders independent of the Fulfillment by Amazon program. However, there are no requirements about what type of Shopify plan you need to have.
Step 2: Add Amazon Sales to Your Shopify Store
Once you’ve determined that your account fits the requirements, you’re ready to add your Amazon profile to your Shopify account. To do this, you want to begin by logging in to your Shopify account.
Under your dashboard, you want to select the plus sign next to the Sales Channels category. Then, locate the Amazon by Shopify feature and choose Learn More. Finally, select Add Channel and then Connect to Amazon, and your accounts will sync up!
Step 3: Create a Product Listing
After integrating your Shopify account with Amazon, you can create new product listings right within Shopify. However, remember that this only applies to products in the Clothing and Accessories category.
To begin creating a new listing, select Amazon from your Shopify account. Next, choose Create Listing, and then Select Product. If the item is your own unique product, you can then fill in the appropriate information. If you’re selling a product created by another company, however, you can search for its existing listing. Simply hit Select when you find the right information, and your listing will be created.
Step 4: Claim Existing Listings
If you aren’t selling in the Clothing and Accessories category, or you’ve already created Amazon product listings, you can link them to your Shopify store by claiming them. To do this, you’ll want to again select the Amazon category under Sales Channels.
After that, select Link Products, and then browse for the items you’d like to link to. Select the appropriate product listings to connect them to your Amazon account. Then you’re good to go!
Conclusion
Incorporating your Shopify account with your Amazon Marketplace account can help you sell more products and attract more attention. These simple steps can help you receive all the benefits of the Shopify software with your Amazon sales.
In the next chapter, we will take a look at how you can integrate Magento into your Amazon Marketplace account as well!
Chapter 9: A Step-By-Step Guide to Integrating Magento Into Your Amazon Marketplace Store
Magento is one of the leading names in the e-commerce industry. As an open-source platform that enables users to control the look, feel, and functionality of their online stores, Magento provides retailers with an opportunity to completely customize their digital shops.
Due to its popularity and ease of use, it’s no wonder that many Amazon sellers want to link Magento to their Marketplace accounts. Let’s take a look at how you can integrate your Magento account with Amazon Marketplace, to improve your shoppers’ experience!
An Introduction to Magento and Its Benefits
Magento is an open-source e-commerce platform that enables individuals from all over the world to develop their own online stores. Through its open-source system, Magento users can select from thousands of completely customizable options, helping them create websites that are entirely their own.
One of the biggest benefits of Magento is its flexibility. With so many different choices, online sellers can completely customize their stores to appeal directly to their target audiences. The open-source platform also ensures that you can keep your store up to date, and find support when you need it.
Integrating your Magento website with your Amazon Marketplace account enables you to keep everything in one place. When you can view your inventory, track sales, and monitor the products you’re selling from one dashboard, you can operate more efficiently and ensure that you’re reaching maximum sales.
How to Integrate Magento Into Your Amazon Marketplace Store
Let’s take a look at the three-step process you can follow to integrate your Magento website with your Amazon Marketplace store.
Step 1: Install an Extension
 Since Magento is an open-source platform, there are many different tools you can use with it. To begin integrating your Magento and Amazon Marketplace accounts, you’ll first need to install a relevant extension. Depending on the extension you select, you should then be given walk-through instructions on how to add the extension to your Magento dashboard.
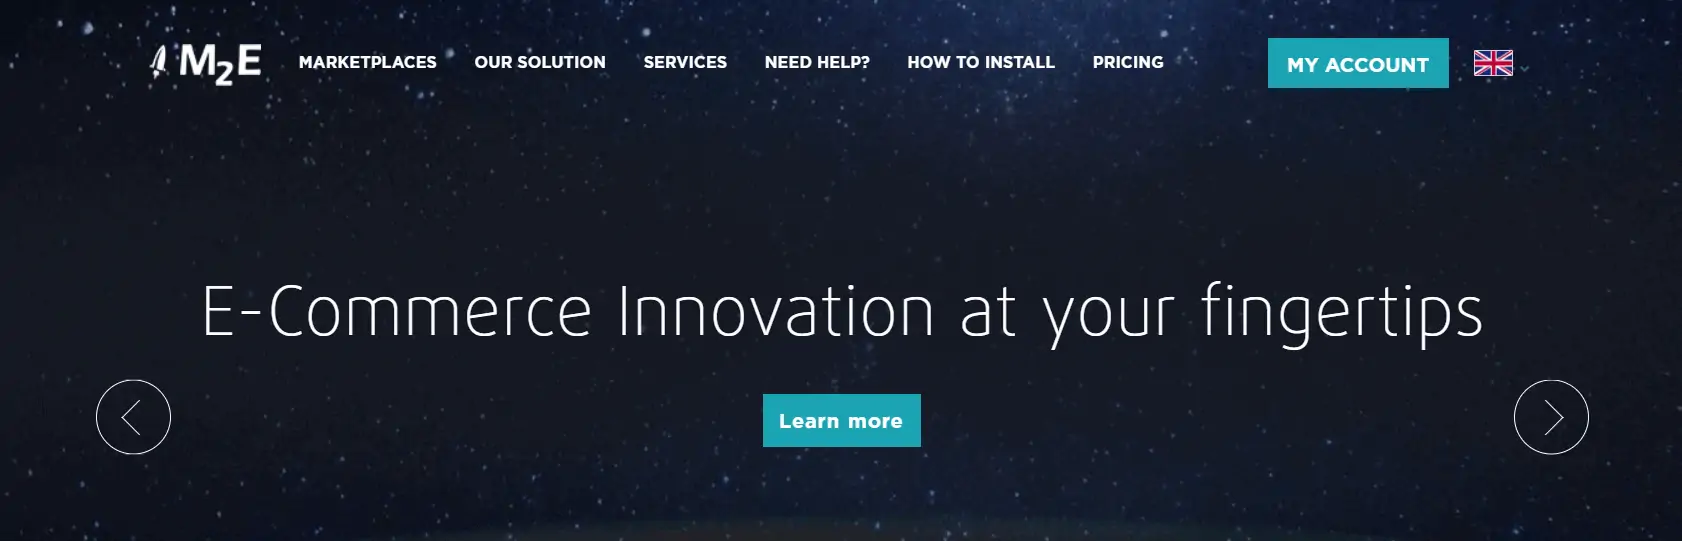
When looking for an extension, you’ll want to consider aspects like cost and reviews. Since Magento operates on an open-source platform, you’ll have a number of options to choose from. However, not all will be compatible. Save yourself a headache, and invest in an extension that comes highly recommended. For the sake of this guide, we’re going to focus on the M2E Pro Extension, which simplifies Amazon integration and is a reliable, easy-to-use tool.
Step 2: Establish Your Channels
Once your extension has been installed, you’ll need to establish the channels that you’d like to sell on. To do this, you’ll want to access your Magento Admin Panel. From there, you can select Sell on Multi-Channels. On the screen that appears next, input your information to set up your license. Once you’ve completed this step, go ahead and click Proceed.
Now you’re ready to establish your channels. The software will walk you through the process of setting up your predetermined channels, as well as connecting your Marketplace account. You will also need to select the countries you wish to sell in through the Amazon Marketplace. Once you’re finished, hit Proceed again.
Step 3: Create a New Listing
Once you have established your channels, you can create your first new listing. You’ll begin by navigating to Sell on Amazon > Listing. You can then click on Add Listing, and input the information necessary to complete the file.
Keep in mind that you will also need to provide payment and shipping information at this stage. Be sure to have it ready, to make creating a new listing a breeze. Once you’ve sufficiently filled in your listing information, you’re all set. Hit Complete and your new listing is created! Then, you can simply repeat the process for each subsequent listing.
Conclusion
Linking your Magento and Amazon Marketplace accounts can help you create a more successful online store and a better user experience for your customers. It can also simplify your own workflow – and it’s easy to do.
In the next chapter, we will talk about some steps you can take to keep your Amazon Marketplace customers happy!
Chapter 10: How to Manage Customer Happiness as an Amazon Marketplace Seller
When you are an Amazon Marketplace seller, your connection with your customers is extremely important for getting repeat sales and referrals. Unfortunately, problems can arise no matter how conscientious you are. If you want to keep your customers happy, therefore, you’ll need to know how to handle those issues.
Proper customer service is crucial to any business. Let’s take a look at a few common mishaps that may occur as an Amazon seller, and what you can do to stay on your shoppers’ good side!
The Importance of Maintaining Happy Customers
Your online reputation will influence the number of sales you get from your Amazon store. When a customer is unhappy with your products or your customer service, they’re likely to leave poor reviews and comments explaining their experience. Considering the vast number of Amazon Sellers who are pushing similar products, a few bad reviews could seriously hurt your business.
Maintaining happy customers can not only encourage past customers to buy from you again, but can also help you attract new buyers. With the right strategy, you can keep your customers happy and grow your Amazon Marketplace account.
Solving Problems as an Amazon Marketplace Seller
As an Amazon Seller, you want to be cautious to ensure that problems don’t arise regularly. Taking extra steps to double check each order and product before it is shipped can help you avoid the need to do damage control later on.
However, there are a number of problems that may arise after you start selling on Amazon, even if you’re cautious about getting everything perfect. A product may not be what your buyer expected, something may break during shipping, or you may simply send the wrong item by mistake. Since you can never completely eliminate these errors, you need to be proactive about how you solve them.

If a mistake does happen, as in the example above, you want to remember the old cliche that the customer is always right. While you may not agree with the reason they’re unhappy, keep in mind that solving the problem and changing their mind should be your first priority. If you get defensive, it will become even more difficult to make them happy (and avoid a negative review).
Instead, respond by doing everything you can to fix the problem and make it right with the customer. Also, keep in mind that Amazon does offer some seller protection for unjustified claims and chargebacks. Following their recommended best practices can help you maintain happy customers, while also ensuring that you’re properly protecting your business.
How to Manage Your Amazon Marketplace Reputation
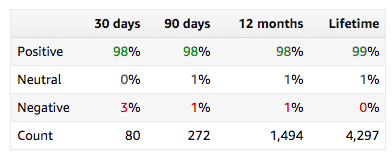
Amazon reviews are one of the most important factors shoppers consider when deciding what product to buy. Shoppers can easily see the percentage of negative to positive reviews that you’ve received, as shown in the example above, and this will play a role in their purchasing choices. Reviews can also influence where a product appears in a search. For this reason, you want to ensure that you’re maintaining your Amazon Marketplace reputation, and securing glowing reviews about your product and company.
When someone makes a purchase, therefore, it can be a good idea to shoot them a message asking them if they’d be willing to leave you a review. However, you need to be cautious about how you solicit these reviews. According to Amazon’s rules, you cannot offer an incentive to a buyer to leave a positive review or to remove a negative review. This also includes providing discounts or coupons in exchange for reviews.
If someone leaves you a positive review, thank them for their kind words and encourage them to purchase again in the future. If someone leaves a negative review, on the other hand, contact them to see if there is anything you can do to change their opinion. In many instances, a negative review is left because the product wasn’t what they expected or it came damaged. If you can replace the product, they may be persuaded to change their review.
Conclusion
When you can keep your customers happy, they will be more likely to keep purchasing from you in the future. Through proper customer service, you can grow a loyal base of shoppers and collect reviews that will sell your products for you.
In the next chapter, we’ll take a look at how you can save time by automating your Amazon Marketplace sales!
Chapter 11: How to Automate Your Amazon Marketplace Sales
Selling on Amazon can be a little overwhelming at first. With so many different tasks involved in running your online store, it might seem impossible to keep track of all your marketing, inventory, and prices. However, your sales process can be made easier with automation.
Automation tools help you eliminate some of the tedious and time-consuming tasks you need to complete as an Amazon seller. Let’s take a look at a few things you can do to automate your Amazon Marketplace sales!
Applying Automation to Your Amazon Marketplace Account
Automating your Amazon Marketplace account means putting some of the processes and tasks on auto-pilot. By using certain technology, you can enable systems to run on their own without much effort on your part. This means that you can get more done in less time.
Automation can also help you land additional sales. For example, in order to stay competitive on Amazon, you need to consistently track the prices of similar products. Automation can make this easier, helping you easily ensure that your items are always fairly priced. It can also let you keep track of your inventory, enabling you to efficiently fill orders and keep your customers happy.
3 Tools for Amazon Automation
Using the right automation tools can make your Amazon Marketplace selling more efficient, and save you a lot of time. Let’s take a look at three tools you’ll want to try!
1. Sellery for Real-Time Repricing
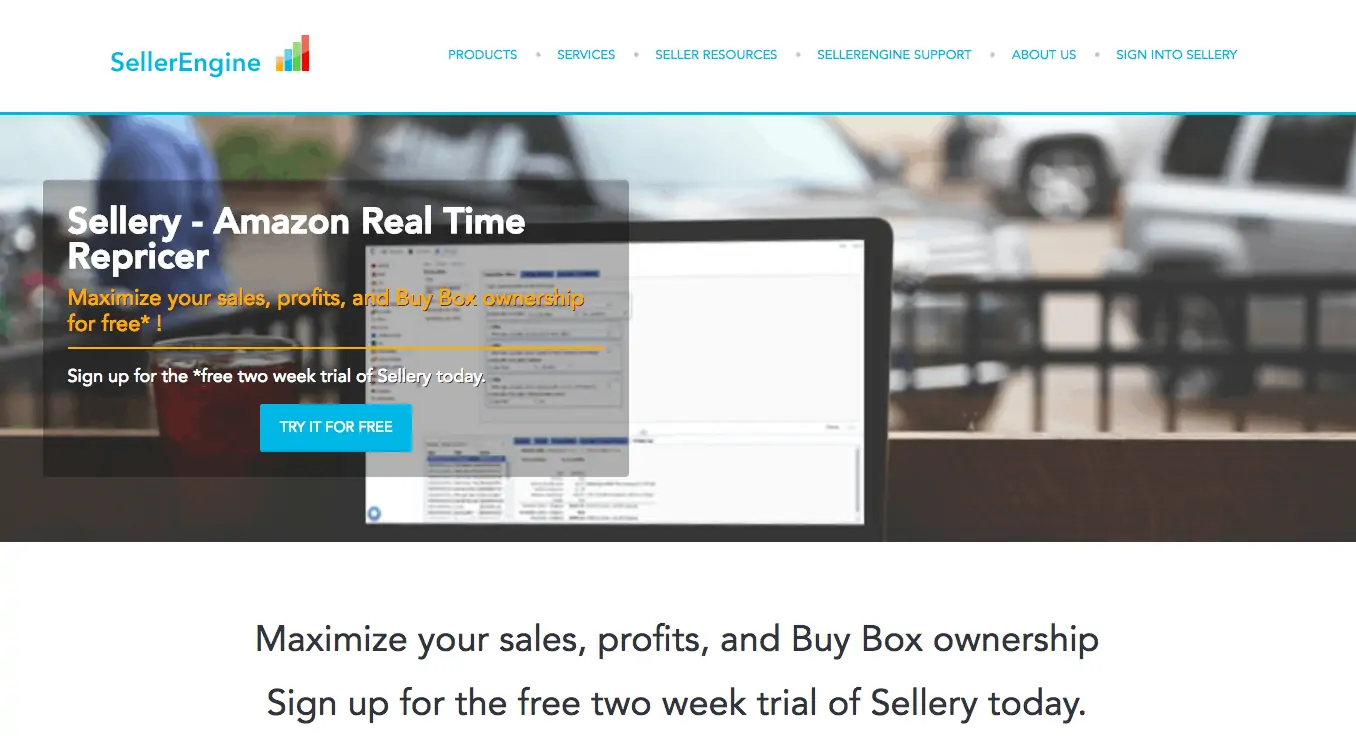
Staying competitive with your pricing is one of the biggest drivers of successful Amazon sales. However, constantly repricing your items can be time-consuming. With Sellery, you can automate this process and have your products reprice themselves as needed.
You can use this tool to set different strategies that ensure your items remain competitive online. Sellery enables you to set specific rules depending on how the market is acting, and it takes care of the rest. For example, you can make sure your products always match your competitors’ prices, or undersell those same competitors by a certain percentage.
The cost of Sellery depends on the volume of your sales. There is a minimum charge of $100/month, plus 1% of your gross monthly sales. However, Sellery does cap these monthly charges at $2000/month. If you like, you can sample Sellery before you purchase by signing up for a free trial.
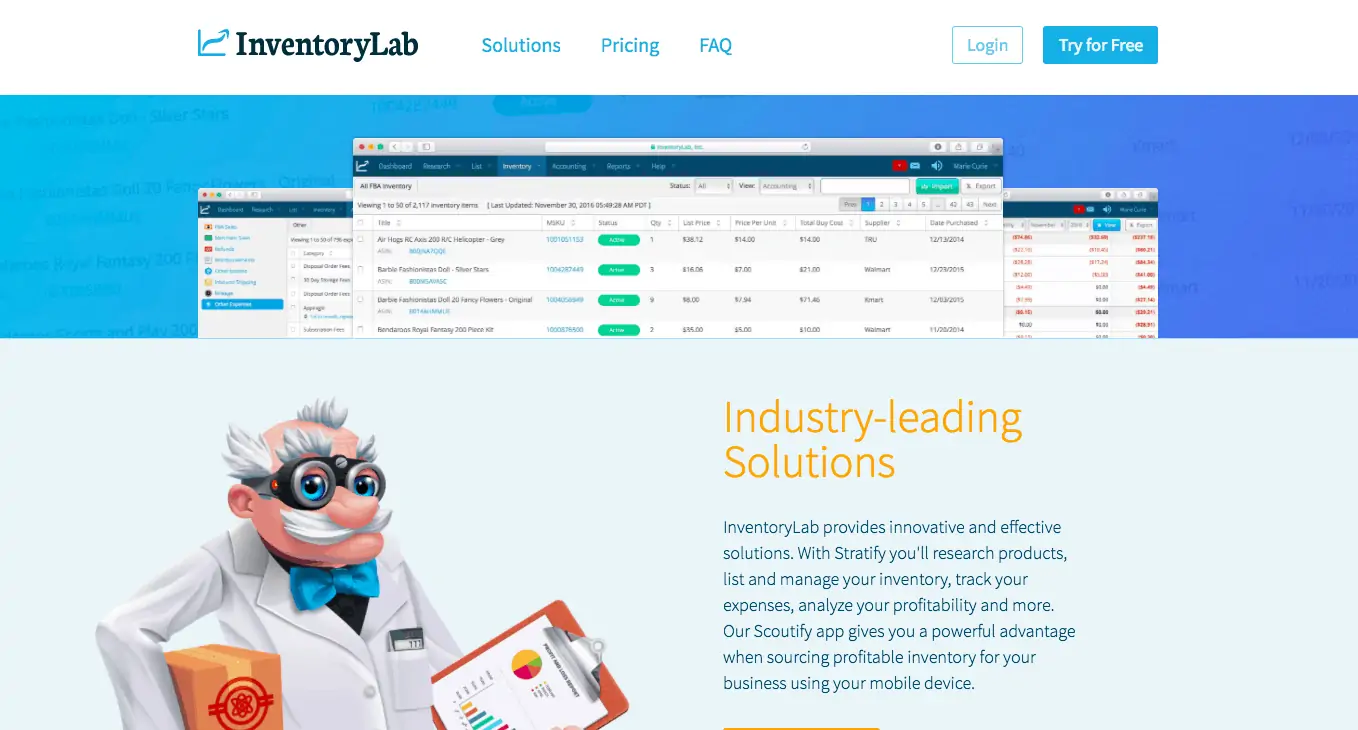
2. InventoryLab for Managing Inventory
 Managing your inventory is important for ensuring that your customers get the items they order when they want them. If you don’t have proper control over your inventory, you may run out of products, miss order due dates, and lose control of your retail store. However, manually monitoring all this information can be stressful.
That’s why InventoryLab enables you to automate your inventory, ensuring that you can keep track of the number of products you have in stock without spending time collecting this information manually. InventoryLab helps you get a big-picture view of the number of items you have in stock, as well as the list price, price per unit, and buy cost of those products.
InventoryLab offers a free 30-day trial, so you can test the product before you buy. If you do choose to purchase it, you can pay a monthly rate of $49, or save some cash by opting for annual billing at $480.
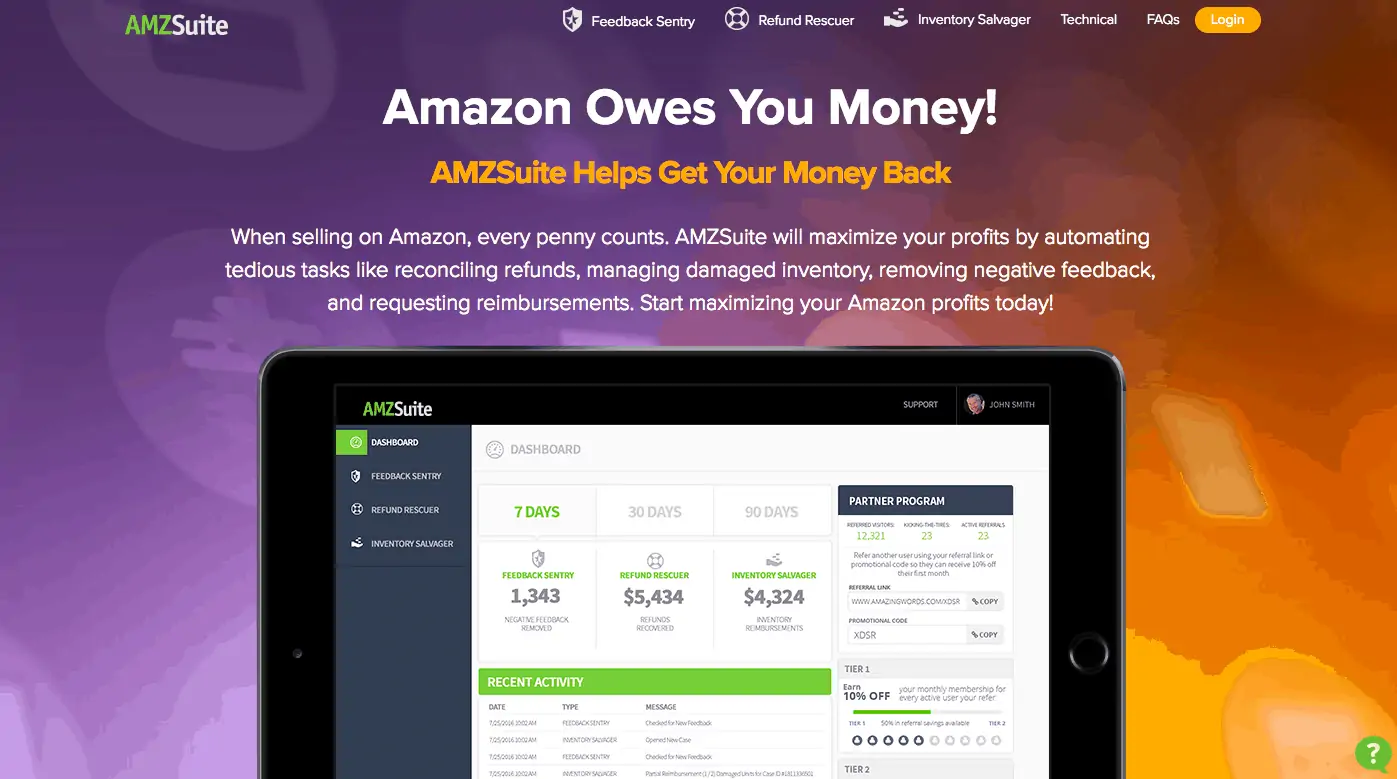
3. AMZSuite for an All-In-One Tool
 Putting all your automation tools into one place can make your work as an Amazon Marketplace seller much easier. When you can use only one tool, like AMZSuite, you can monitor your marketing, inventory, feedback and more under one dashboard. This will save you a lot of time and hassle.
AMZSuite focuses primarily on feedback, refunds, and inventory. By automating your negative feedback responses, handling your refunds, and tracking your items in stock, this tool enables you to focus on other aspects of running your retail store.
If you decide to try it out, you’ll find that AMZSuite is easy to get started with, and very customizable. You can get an all-inclusive package for $79 per month.
Conclusion
Automating your Amazon Marketplace sales can help you save time and sell more products. With the right tools in place, you can become a master of Amazon selling and grow a successful online store quickly.
In the next chapter, we’ll talk abut how you can create a content marketing strategy for your Amazon Marketplace account!
Chapter 12: How to Create a Content Marketing Strategy for Your Amazon Marketplace Store
Content marketing is one of the best tools for promoting your online store and attracting new attention to your products. However, many Amazon sellers are unaware of the benefits a strong content marketing strategy could bring to their business.
The truth is that putting out quality content can help your Amazon store stand out from the competition. Let’s take a look at a few ways you can develop a strategy that will boost your success!
Why Content Marketing Is Important for Amazon Sales
Content marketing means using blog posts, product guides, videos, infographics, and so on to share information, improve trust, and build awareness about your brand. Instead of marketing your products directly, you focus on providing quality content and building a dedicated audience.
As one of the most popular kinds of online marketing, content marketing helps stores and businesses attract attention and land more sales from new customers. A strong strategy can improve your search engine rankings, by giving you an outlet to use keywords and attract online searchers. Finally, content marketing can also help you expand your reach and get your products in front of a new set of potential leads.
3 Ways to Use Content Marketing to Expand Your Amazon Sales
When getting started with this technique, you want to be strategic about the content you develop. Here are three ways you can improve your sales with a little effort and forward thinking.
1. Create Product Guides
Product guides are a smart way to introduce your items to your target audience. As an overview of what your products can do and why they are beneficial, a product guide can help potential customers identify which purchase is right for them. Product guides also educate your target audience, increasing your number of satisfied customers.
When you create product guides as part of your content strategy, as in the example above, you can use them to fuel your social media strategy as well. You can also feature them on your website, ensuring that shoppers can easily find them at any time. To increase engagement with your product guides, make sure they’re visual, easy to understand, and comprehensive.
2. Connect with Bloggers
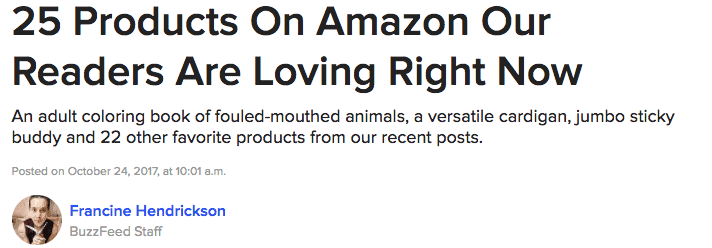
When creating a content strategy, you’ll also want to consider how you’re going to share the pieces you create. Connecting with bloggers is a perfect opportunity to get your Amazon store’s details in front of a trusting and open audience. A network of bloggers can help you promote products and share your content. You may even convince others to create their own content featuring your products, as in this example from Buzzfeed:
In order to convince bloggers to work with you, you need to create a mutually beneficial environment. In some cases, you may want to consider setting up an affiliate network for bloggers, so they can get a cut of the products they sell. Offering to share the bloggers’ content on your own social media sites and platforms can also entice them to promote your store.
3. Develop Product Videos
Not all content needs to be written. In fact, you can get even more engagement by creating content that is visual, such as product videos. Videos about the products you’re selling can help your shoppers understand how they work, what they can do, and whether or not they’re a smart purchase. Videos are also perfect for sharing on other platforms, such as YouTube or social media, as shown in the example below:

If you’re going to use video in your content strategy, you’ll want to consider asking influencers, past customers, and bloggers to create videos of their own too. While creating your own tutorials or product overviews is great, shoppers tend to trust other buyers first. If you can encourage video reviews, you may be able to land more sales.
Conclusion
Quality content can help you push more shoppers back to your Amazon store and encourage them to buy. With a strong content marketing strategy, you’ll be able to stand out from your competition and attract more sales.
In the next chapter, we’ll take a look at how you can track your Amazon sales to measure your success!
Chapter 13: Tracking and Measuring Your Amazon Sales Success
Growing your Amazon store requires selling the right products, implementing strong marketing strategies, and making long-lasting connections with your customers. However, in order to truly know whether you’re making progress with your Amazon store, you need to properly track your sales as well.
Tracking, measuring, and monitoring your sales and marketing enables you to understand what you’re doing right and see where you still have room for improvement. Let’s take a look at how you can measure your sales success!
Why Tracking Your Sales Success Is So Important
Tracking and measuring your marketing and sales enables you to better understand what your audience is connecting with. Through identifying your most popular products and content, you’ll be better able to serve your customers and develop a marketing strategy that improves your sales.
When you properly track your sales success, you can also make more strategic decisions when it comes to promoting your Amazon Marketplace store. For example, once you understand what your target audience is drawn to, you can provide them with more products or materials that fit their unique preferences.
How to Track Your Amazon Sales Success (3 Key Strategies)
Now, let’s examine a few different ways you can track your Amazon sales success.
1. Track Your Product Rankings with SellerMetrics
When selling on Amazon, product ranking is a major influence on how many products you move. If your competitors are appearing higher in searches, you may find that they’re selling more. Knowing how your products are ranking can help you better understand where you’re at.
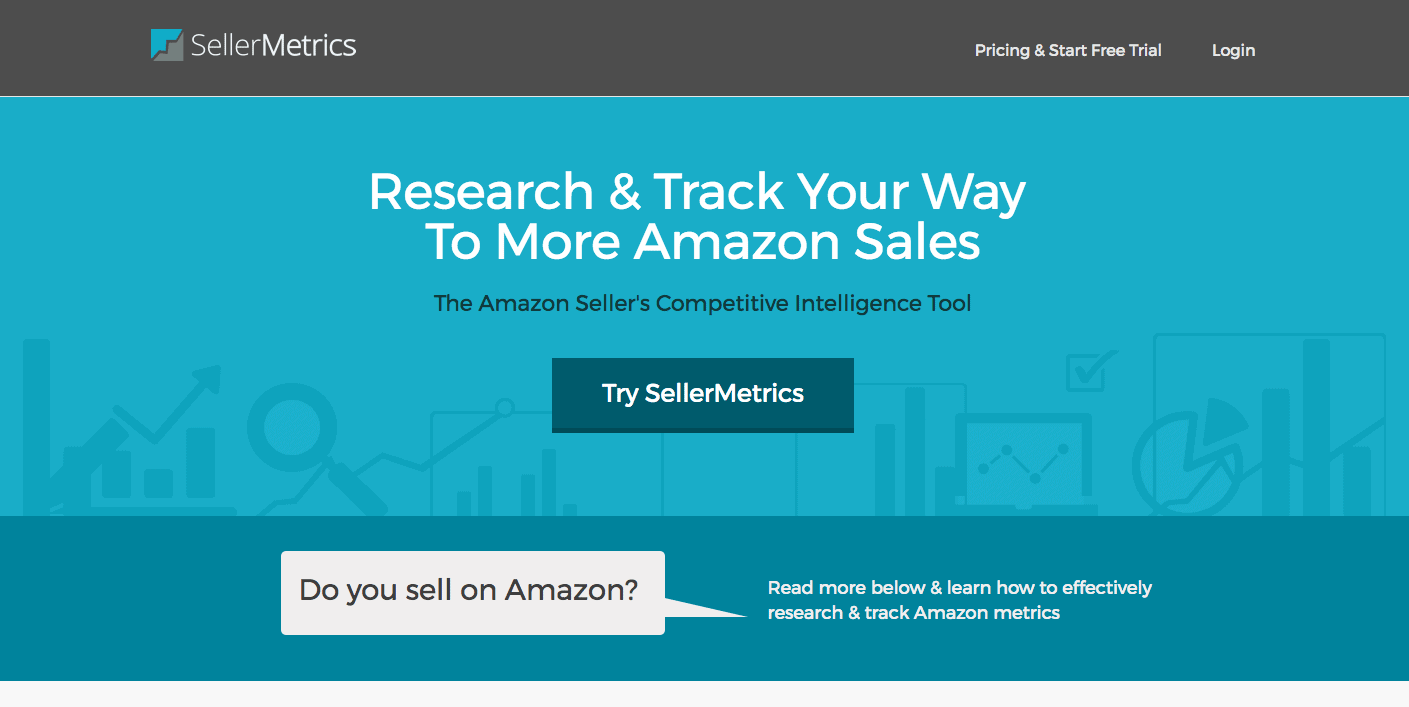
SellerMetrics is a handy tool you can use to keep track of your product rankings. By automating the process, SellerMetrics enables you to keep an eye on your competition while saving you time and money. Through using this program to track how visible your products are, you can identify key changes that may have influenced your sales and find out which items that still need improvement. SellerMetrics offers a free 14-day trial, along with full plans starting at $40 per month.
2. Monitor Your Amazon Reviews with AMZ Tracker
Your online reputation is crucial to maintaining a high sales volume. If you have a lot of negative reviews, you will find that it’s difficult to land more sales. Additionally, the more positive reviews you have, the more likely you are to appear at the top of relevant search results lists.
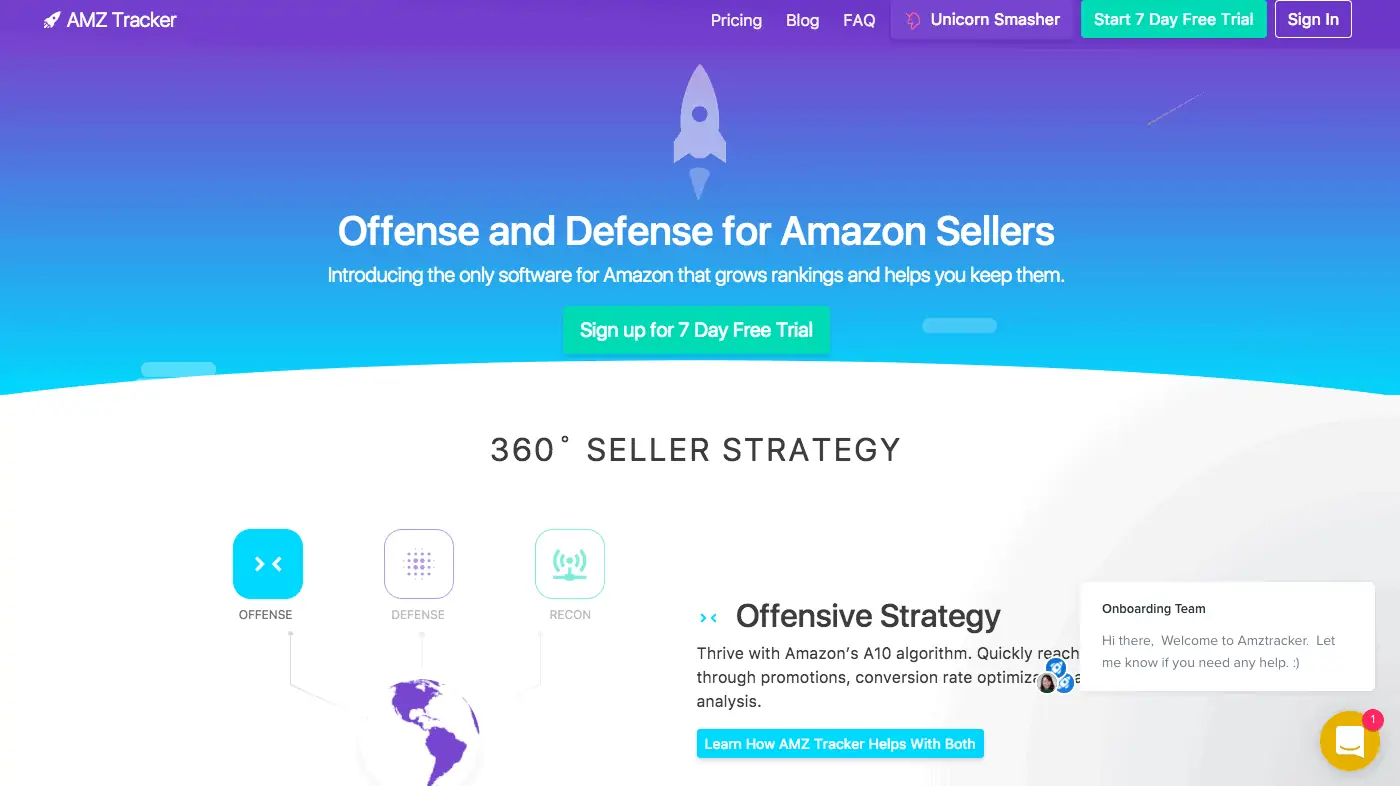
To monitor your Amazon reviews, you can use a program such as AMZ Tracker. Any time you have a review that is less than five stars, AMZ Tracker will send you an alert. This enables you to reach out to the customer in an efficient manner, and solve any potential problems they may be experiencing. With any luck, they may amend their review. AMZ Tracker offers new users a 7-day trial, and has plans beginning at $33 per month.
3. Measure Your Profits with Sellics
Knowing how much profit you’re making is an important part of keeping your business running. If you’re not sure what your profit margins are, you may find that you’re struggling to stay afloat. However, profit tracking can be time-consuming to conduct manually.
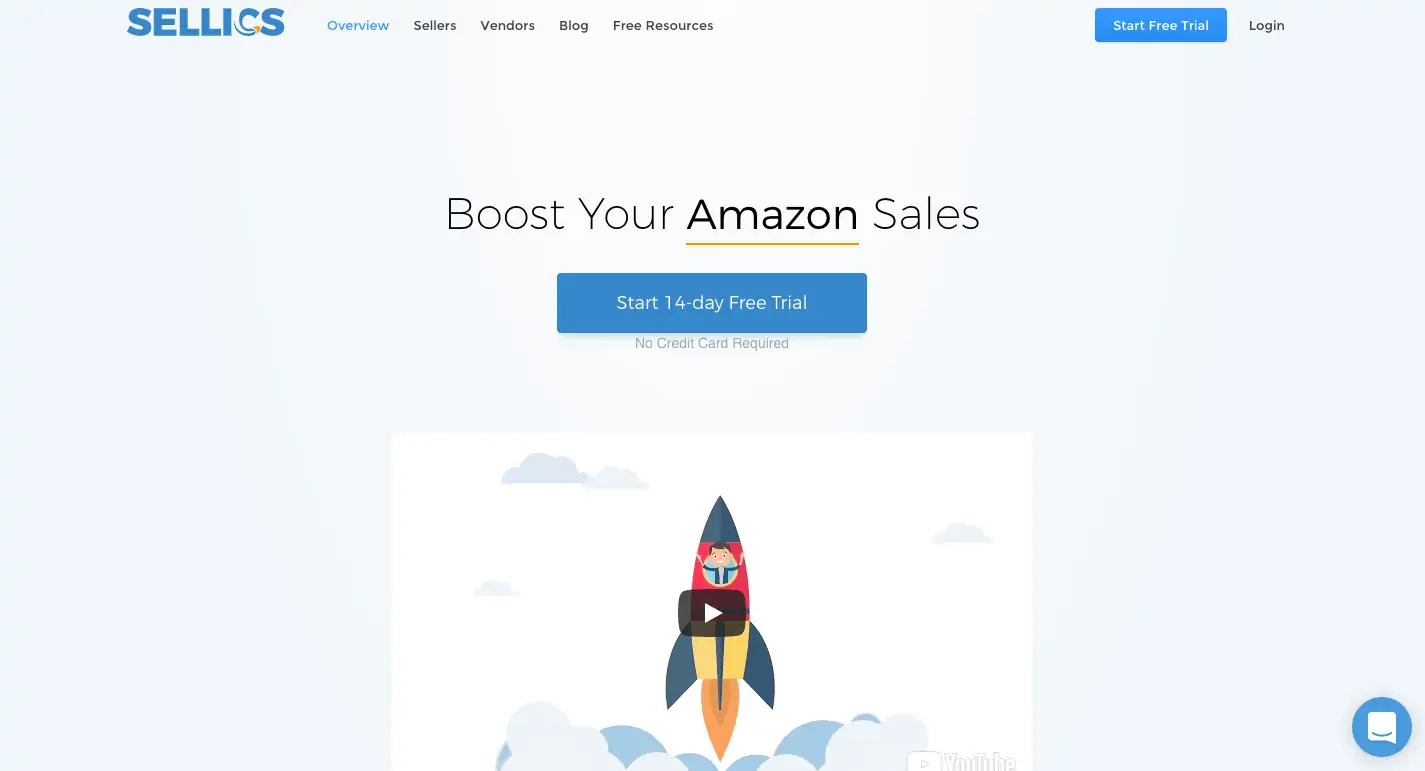
Sellics is an excellent way to keep track of your profits. Since all your information is displayed on an easy-to-read dashboard, you can see how your profits change over time. This helps you make more strategic decisions about how you price your products, and what you’re spending on ads and marketing. You can get a 14-day free trial of Sellics, and the regular plans begin at $77 per month.
Conclusion
Knowing how well you’re performing on Amazon is crucial if you’re serious about growing a successful online store. With the right tracking and monitoring tools, you can understand whether or not you’re making the right decisions that help you connect with your audience and sell more products.
To help you get a firm grasp of how successful your store currently is on Amazon, you can use SellerMetrics, AMZ Tracker, and Sellics to improve your sales strategy!
Final Thoughts
If you want to be successful on the Amazon Marketplace, you’ll need to spend some time upfront conducting research and preparing your store for success. You’ll need to understand what types of products sell well, what your target audience is looking for, and how you can best market your store to increase traffic and improve sales. Once that work is done, you’ll be ready to create a thriving, profitable ecommerce store.
Throughout this guide, we’ve made your job a little easier by explaining all the ins and outs of the Amazon Marketplace platform. Let’s recap some of the most important steps to creating and running your new store:
- Fill out your Amazon account profile completely and thoroughly.
- Offer a selection of products that your target audience is interested in purchasing.
- Optimize your account to attract as much attention as possible.
- Set prices that enable you to be competitive while still remaining profitable.
- Consider integrating an additional platform such as Shopify or Magento, to create a unique shopping experience for your buyers.
- Use automation and content marketing to help spread the word about your business.
- Track and measure your Amazon sales, so you know what is working and what needs improvement.
What questions do you still have about developing an Amazon Marketplace store? Ask us anything in the comments section below!