Not without the reason, Shopify (our full Shopify review here) is one of the most popular online store solutions out there. It’s main benefit? For a very affordable price, it lets you build a functional online store all by yourself. And not just any online store … what I’m talking about here is a truly quality result. Something that looks and works just like a pro would have built it.
So, in this tutorial, we’re going to discuss how to set up your first eCommerce store on Shopify. We’re covering the entire process, from a blank canvas to a fully functional eCommerce store ready to welcome your customers.
(This guide – “How to set up your eCommerce store on Shopify” – has been written with the beginner in mind, no coding or website building skills needed.)
But first…
What is Shopify?
Shopify is a complete, all-in-one eCommerce solution. Once you sign up for an account with Shopify, it allows you to:
- Build your online store all by yourself.
- Pick a design that suits your needs.
- Pick a unique name and domain for your store.
- Add your products and their details (price, description, etc.).
- Process orders from your customers.
- Handle online payments through solutions like PayPal and others.
- Run special promotions, discounts, and sales.
- And much more.
At the same time, Shopify is a way more affordable choice than hiring someone to build the store for you. Not to mention that it’s also more reliable over the long haul (the software itself is constantly upgraded, and there’s great customer support available).
To learn more about the ins and outs of Shopify, and find out whether or not it’s the perfect solution for your specific needs, feel free to visit our review. There, we point out all the pros and cons of Shopify and discuss the most important characteristics of the platform.
[toc]
How to get started with Shopify
Although this might seem hard to believe at first, in order to get started and set up your eCommerce store with Shopify, all you need is an hour of your time.
First, go to shopify.com and click the “Get started” button:

After that, you’ll be taken to the sign-up form. Just a classic thing … you’ll need your email, password, and a name for your store. I went with “Hats R Great”:
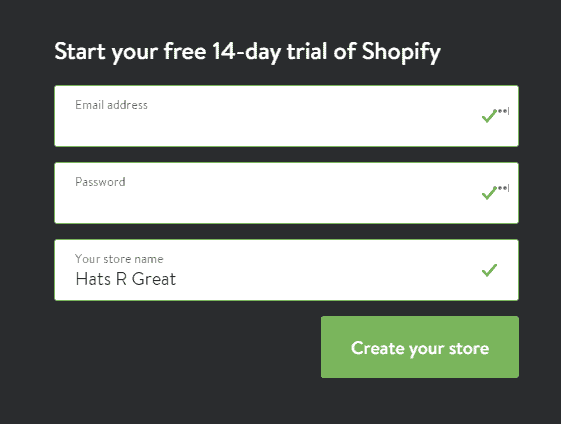
As you can see, there’s a free 14-day trial here, so you don’t need to spend any money to test things out and see if Shopify really fits you and your eCommerce store.
The next step is an important one from a legal point of view. Basically, if you want to operate like an actual store, you need to provide some details about your business.
Just a common web form:
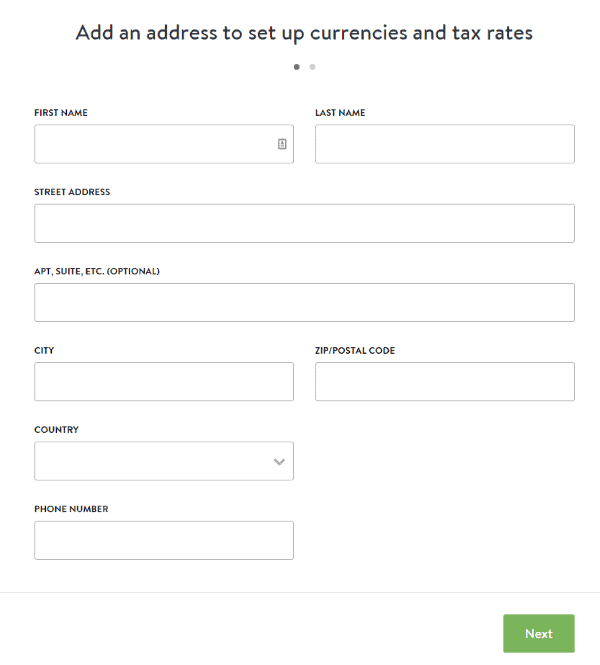
After you click “Next,” Shopify will ask you about a handful of additional business details. Based on what you select, Shopify will try to optimize your experience going forward:
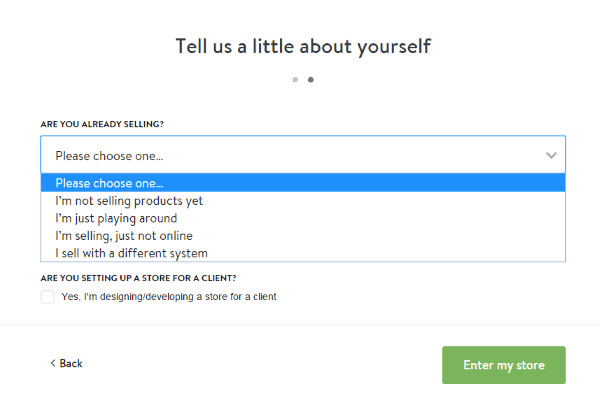
At this stage, it’s time to start setting up the parameters of your new eCommerce store on Shopify.
How to set up your first online store with Shopify
Let’s start with looking through the main dashboard of Shopify:
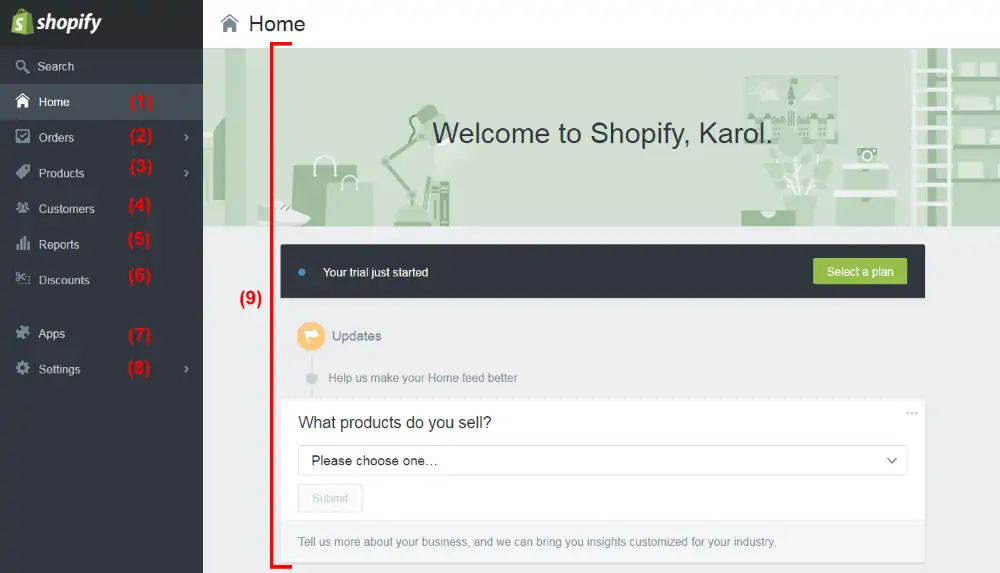
- (1) The homepage of your dashboard. It’s where you can get to the details of what’s going on with your Shopify store.
- (2) It’s where your first orders will show up, and where you’ll be able to manage every incoming order.
- (3) It’s where you can add and manage your products, inventory, product collections, gift cards.
- (4) It’s where you can manage your customers and every piece of info you have about them. This includes their past orders, their personal details, their stats (e.g. sales volume), and much more.
- (5) It’s where you can generate all kinds of reports about your store’s performance.
- (6) It’s where you can create discount codes and distribute them to people.
- (7) It’s where you can install new apps and extend Shopify with new functionality. Really cool stuff. For instance, you can install an app for SEO, for email marketing, and so on. Particularly useful for advanced users.
- (8) This is where all settings related to the store can be found. This includes things like your personal info, payments settings, checkout settings, taxes, shipping, and more.
- (9) The main screen of each panel.
Let’s stop on that last item for a minute. When you visit the dashboard for the first time, Shopify will present you a list of actions that you can take to fully customize and launch your store to the public. Let’s do that.
In the case of my new store, here’s what Shopify tells me to do:
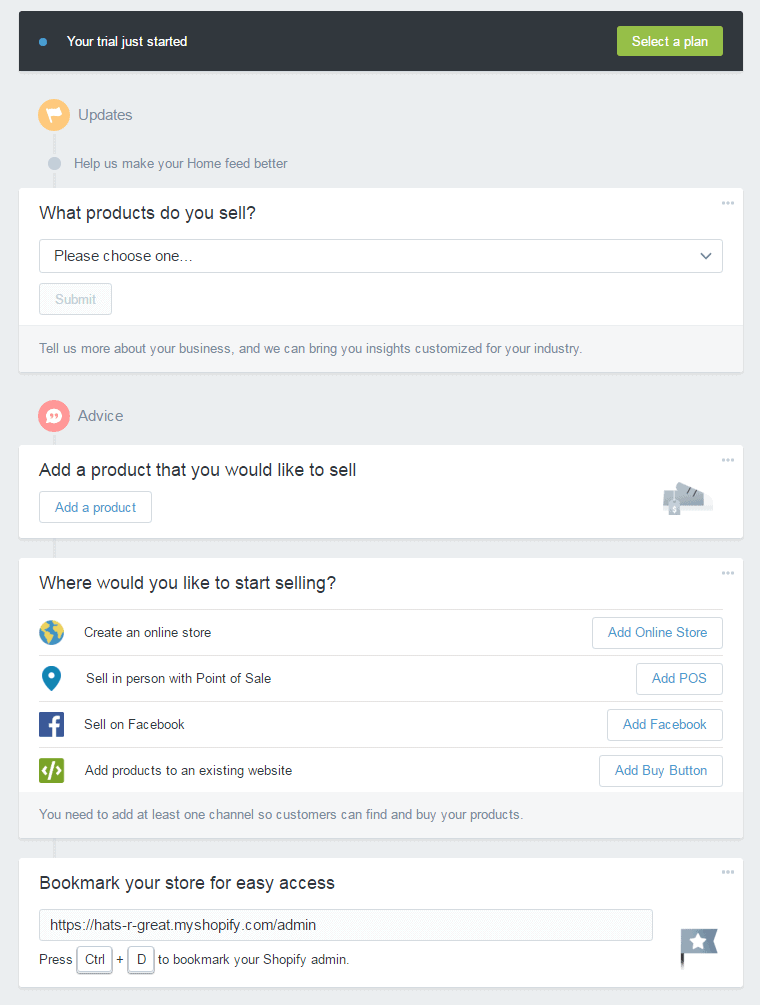
- From the first drop-down, I’m going to select “Fashion and Apparel.”
- Then, I’m going to add my first product. Just click on the “Add a product” button that you can see above. Shopify will then take me to the “Add product” page, where I’m able to complete the process:
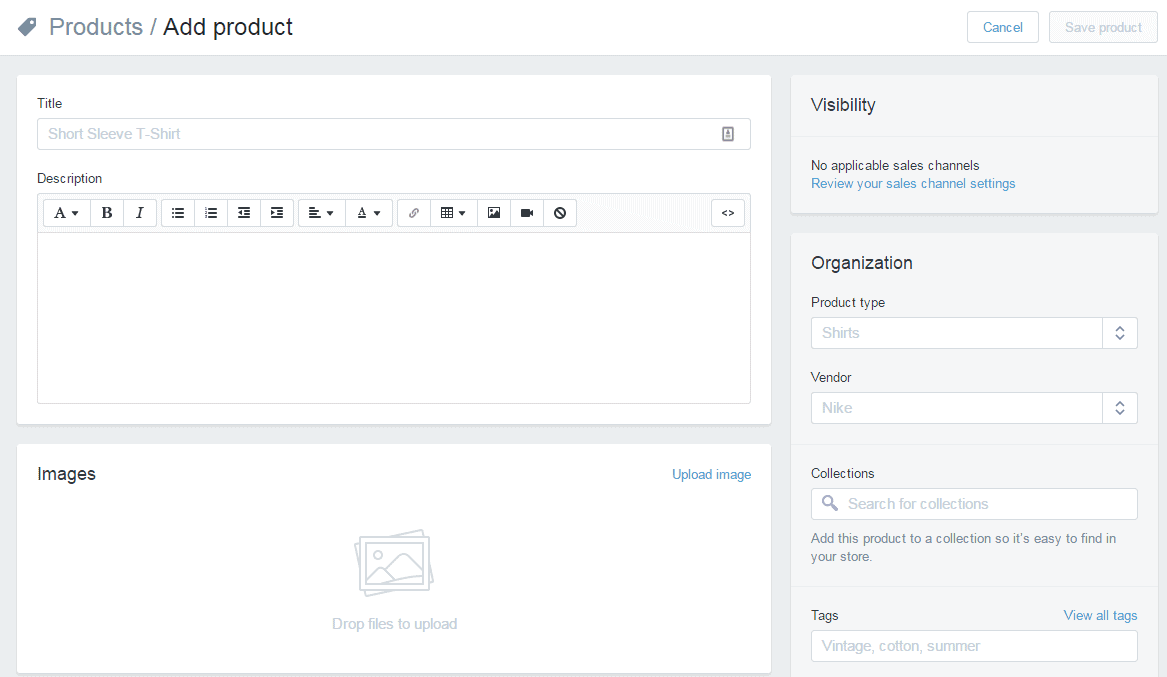
I’m calling my first product “French Bulldog Hat.” I’ll add some description, plus a picture of the hat.
The nice thing here is that adding images works through drag-and-drop. So just take an image from your desktop, and drag it onto the section marked “Drop files to upload.” Like so:
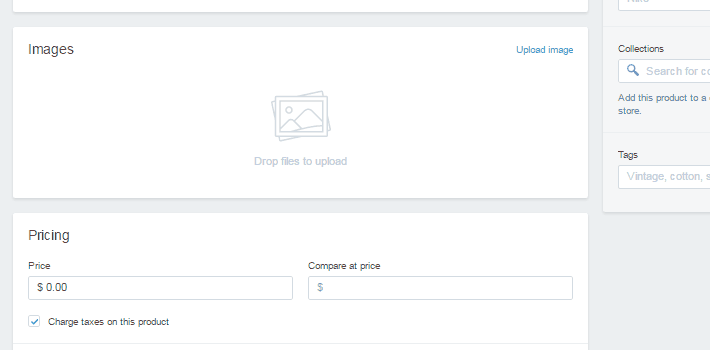
At this point, you can set legal parameters such as taxes, shipping variants, and also set your inventory (but that’s all optional).
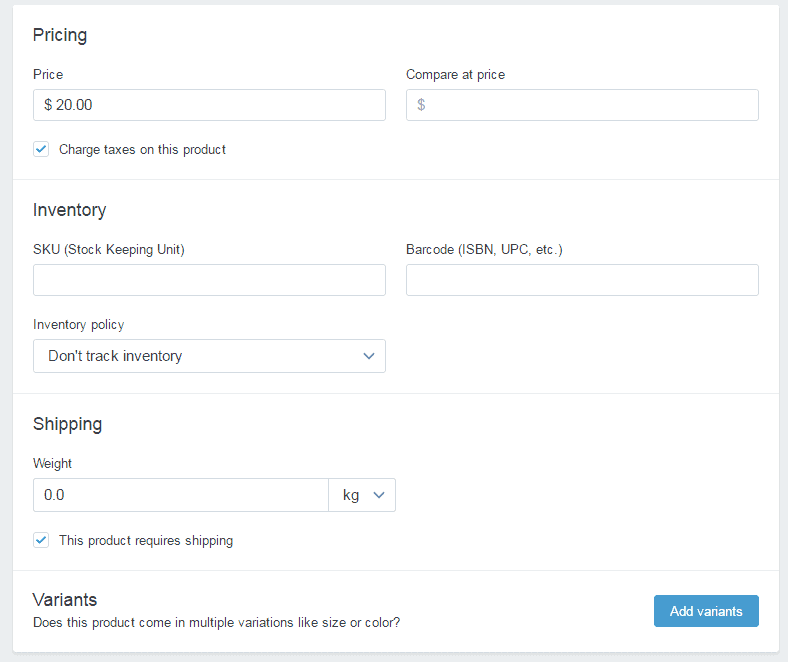
When you’re done, just click on the “Save product” button.
If you go to your products list right now, you’ll see the first product just waiting there to be bought!
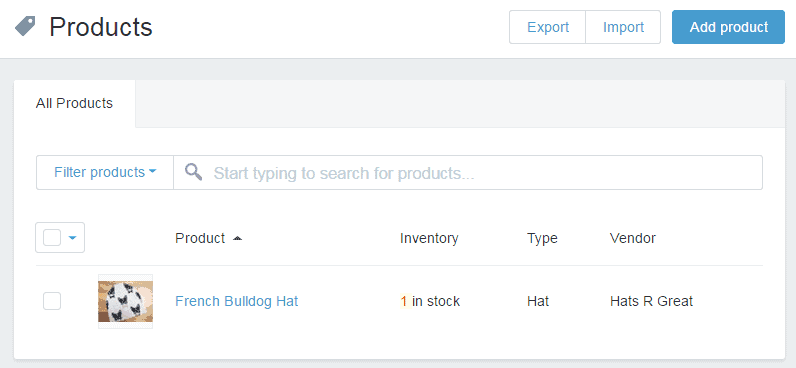
Okay, let’s come back to the dashboard now and take care of the remaining settings of our eCommerce store on Shopify (the “Home” link in the sidebar).
At this point, we have an option to:
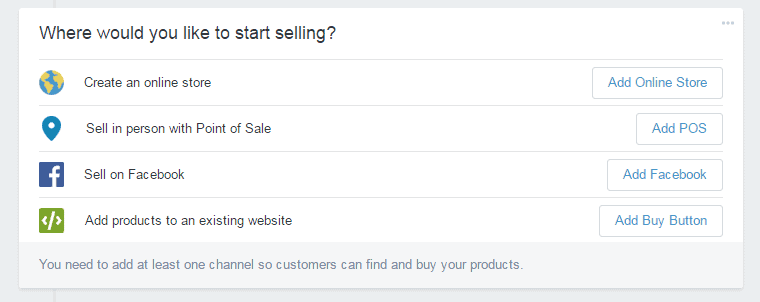
From those four, the most useful option is going to be “Create an online store.”
The remaining three are about, respectively, selling products in person in your actual brick-and-mortar store (Shopify can help with that too), selling directly via Facebook, adding stand-alone single products to your website outside of Shopify (this means that you can, for instance, add a buy button to your WordPress blog).
I’m just going to click on “Add Online Store.”
Picking a design for your Shopify eCommerce store
This is what you’ve been waiting for … it’s time to pick a design for your new eCommerce store:
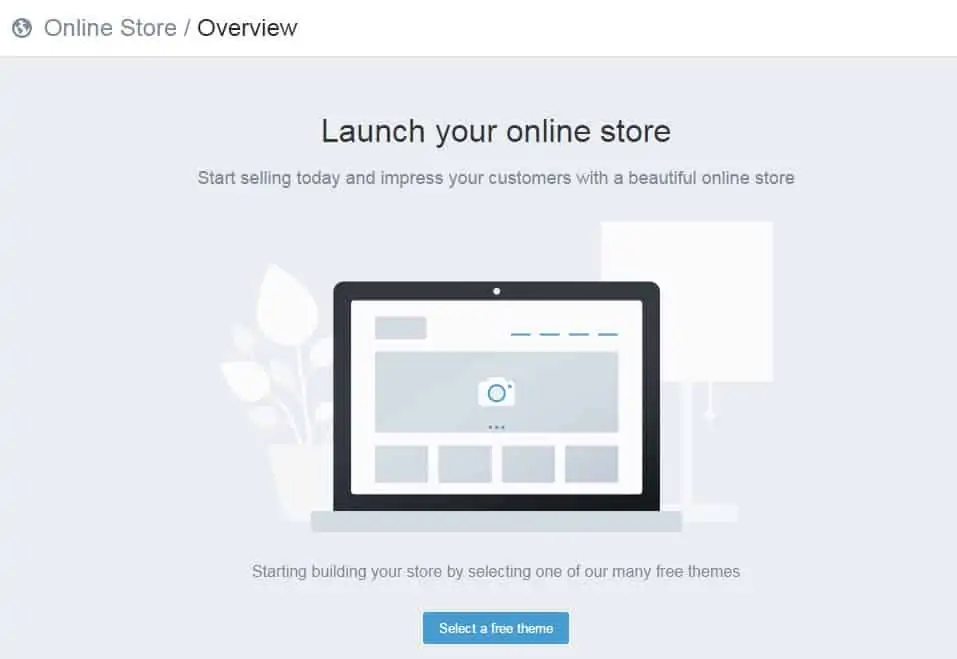
Let’s start by clicking the “Select a free theme” button.
Shopify offers a load of great-looking free designs. All you have to do is just pick one. No design skills needed at all to launch a truly good-looking eCommerce store on Shopify.
Okay, so browsing through what’s available:
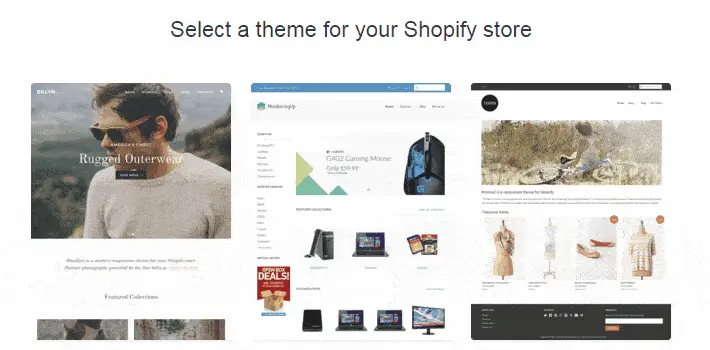
… I think I’ll go with the one simply called … “Simple”:
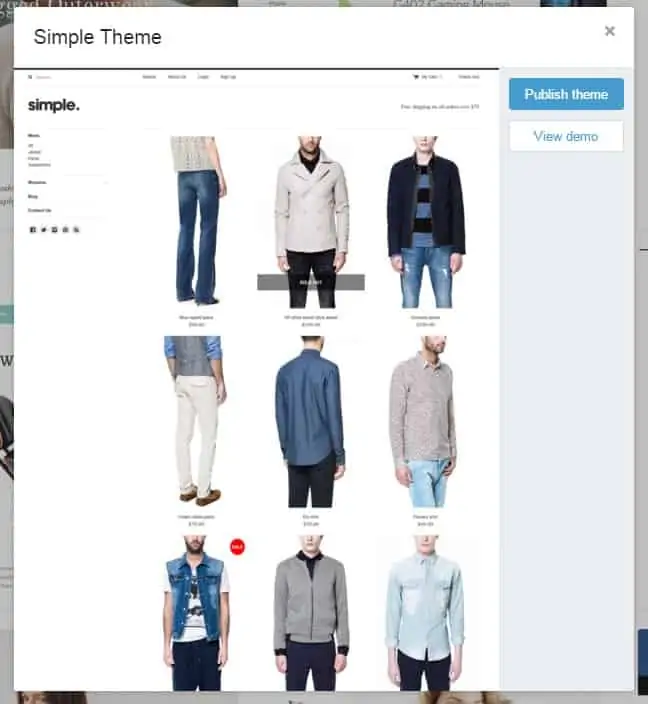
(Note. Every design offered by Shopify is optimized to be viewed on desktop, mobile and tablets. Also, when selecting your design, please don’t worry about the kind of products that are showcased in the theme’s demo. Those are just examples. After you launch your store, you can sell whatever you wish through any of the themes.)
At this point, let’s just give the “Publish theme” button a click, and your design will be set.
In the next step, Shopify will present you an example of what your store looks like, along with its appearance on mobile.
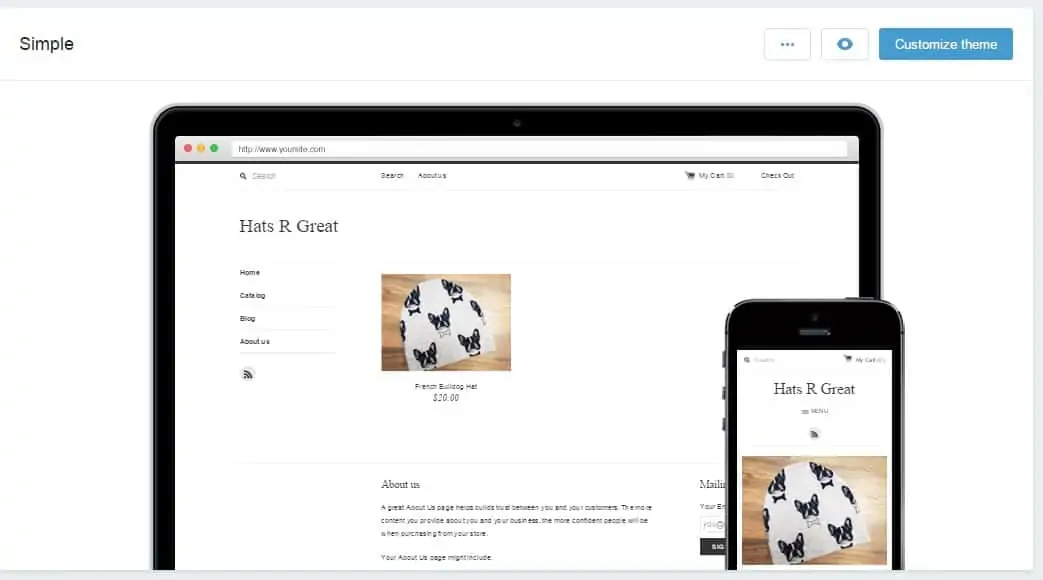
If you want to, you can click on the “Customize theme” button to adjust the design you’ve selected. There’s a couple of handy options here, and I invite you to experiment with them on your own, but let’s just point out some basic details. Here’s the customization screen:
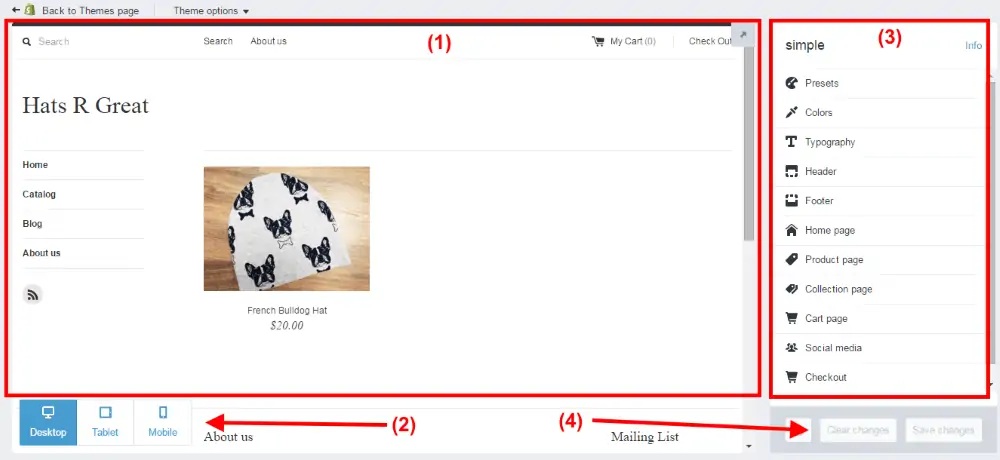
- (1) The main view of your eCommerce store on Shopify – this is what it currently looks like.
- (2) The device switcher – see what your store looks like on desktop, tablets, and mobile.
- (3) The options panel – this is where you do your adjustments.
- (4) The saving panel – save or cancel your changes there.
Right now is a good moment for you to go through the options panel, section by section and experiment with what’s there.
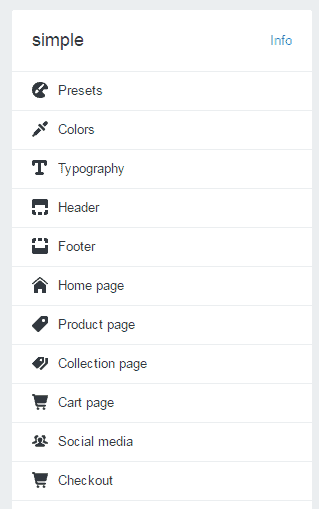
For example:
- Go into “Presets” – see if you like any of the pre-made variants of the theme’s design.
- Go into “Colors” – set the colors for your text, icons, headings, and etc.
- Go into “Typography” – change the default fonts (it’s the easiest way to give your store a unique look).
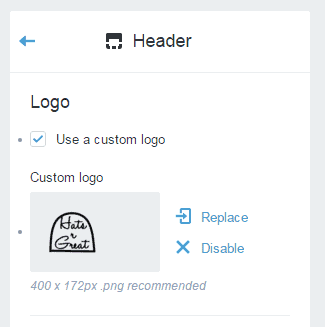
- Go into “Header” – set the logo that’s going to appear on your Shopify store. Like so:
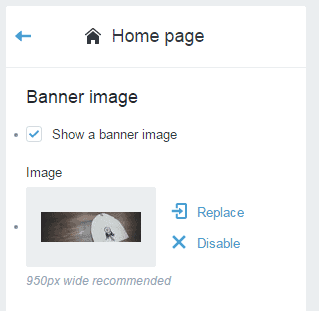
- Go into “Home page” – choose a banner image for your store. Like so:
- Go into “Social media” – link your Shopify store with your social accounts.
When you’re done having fun there, just click the “Back to Themes page” link:

Setting up page content in your store
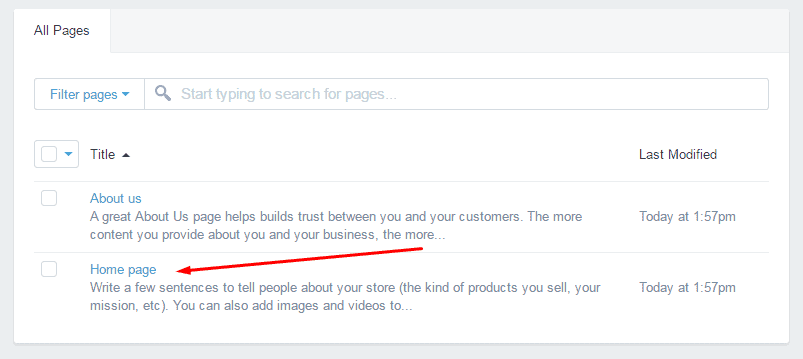
So, with the products and the design handled, let’s now include some texts onto your pages. Particularly, the homepage. For that, let’s go to Online Store / Pages (from the left sidebar):
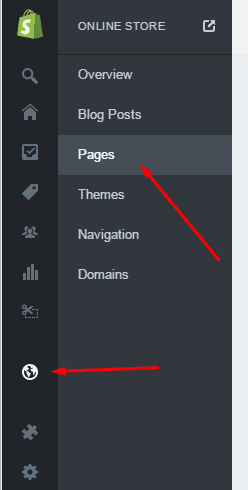
Once there, click on “Home page”:
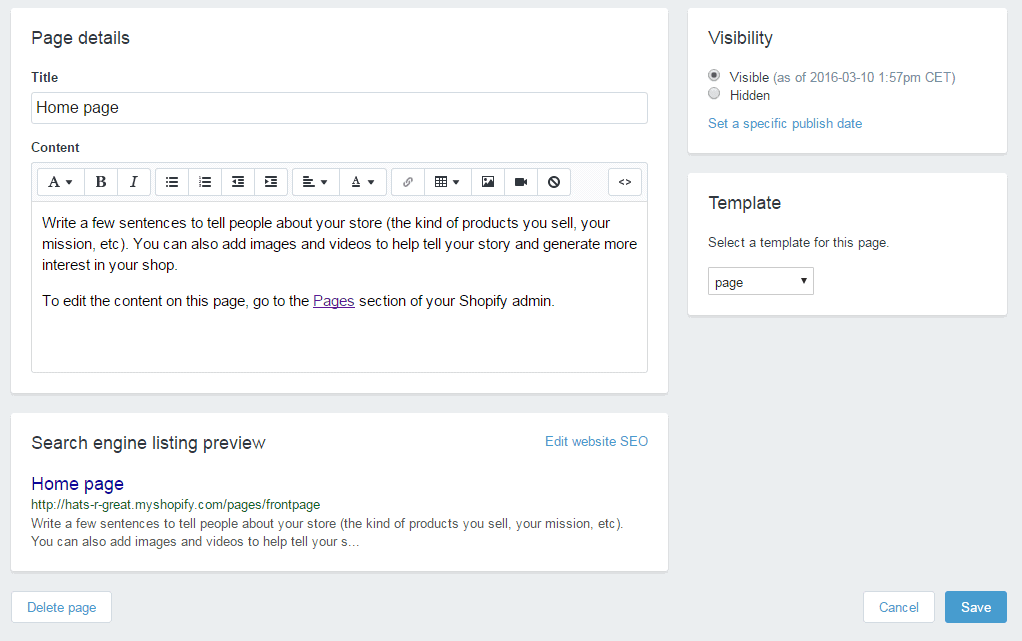
This is where you get to write a few sentences about your store:
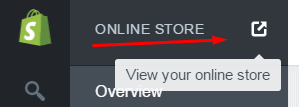
After you’re done with all that, you can save your homepage and see what your store looks like. At any stage, you can do that by clicking this icon:
Important things not to forget
Right now, you’re done with the basic process and you’ve learned how to set up your eCommerce store on Shopify. But there’s still a couple of required steps to get your store officially ready for customers.
Selecting a domain on Shopify
By default, your store gets a subdomain, like:
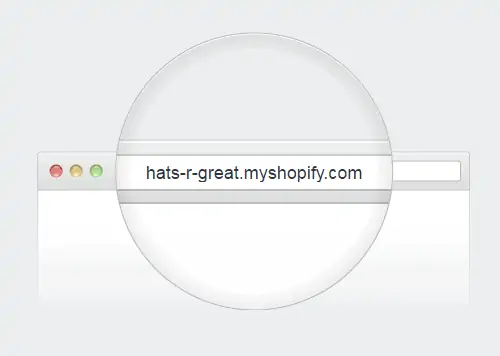
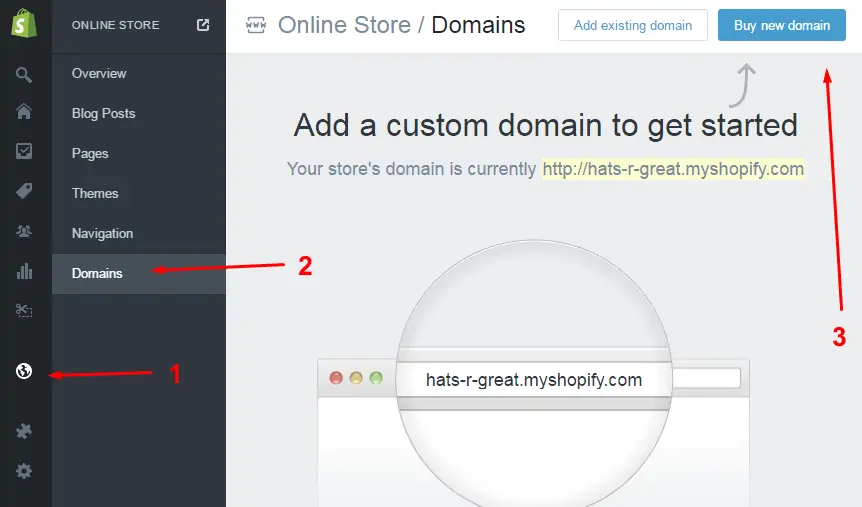
You can upgrade to a standard, custom domain right through Shopify. Just click the “Buy new domain” button, and Shopify will guide you through the process:
Enabling online payments within Shopify
Before your customers can buy anything, you need to integrate your store with an online payments gateway. This can be done in Settings / Payments.
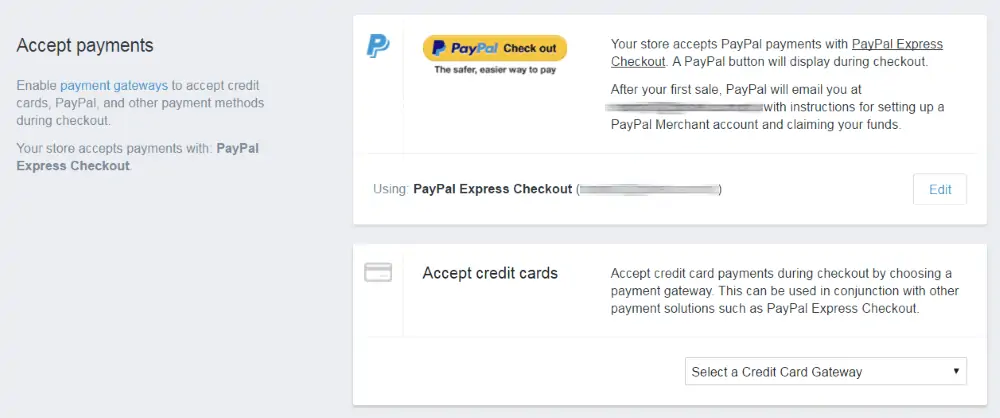
By default, Shopify comes integrated with PayPal, it lets you accept credit cards through various other gateways, and also provides you with a handful of alternative payment methods.
The easiest way to get started is certainly working with PayPal. Shopify actually handles this out of the box for you. No need to adjust anything, as long as you use the same email address for your Shopify store and your PayPal. If not, you can change this in the settings by clicking the “Edit” button:
After every sale, Shopify will credit your PayPal account automatically.
How to make your Shopify store public?
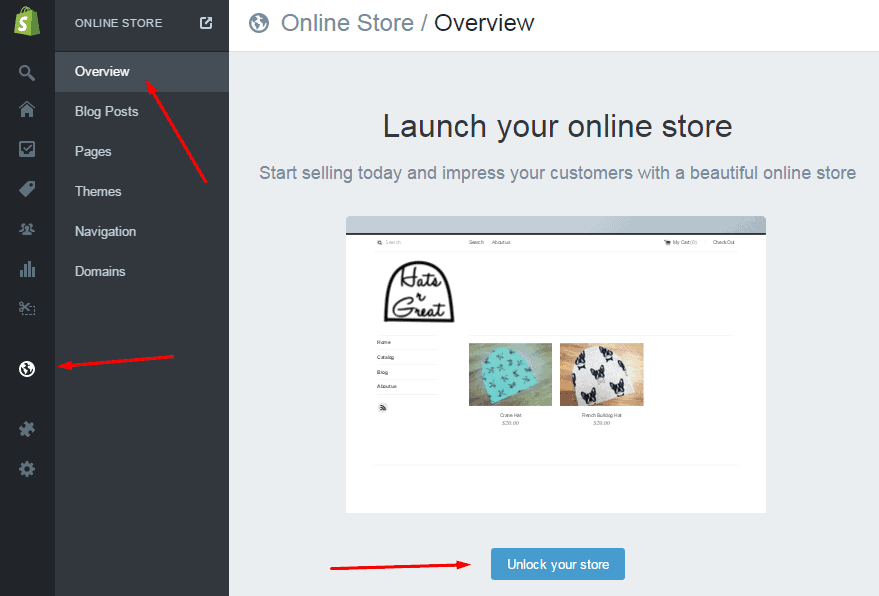
The last step on your way to setting up an eCommerce store on Shopify is to make it public. To do so, go to Online Store / Overview, and click the “Unlock your store” button:
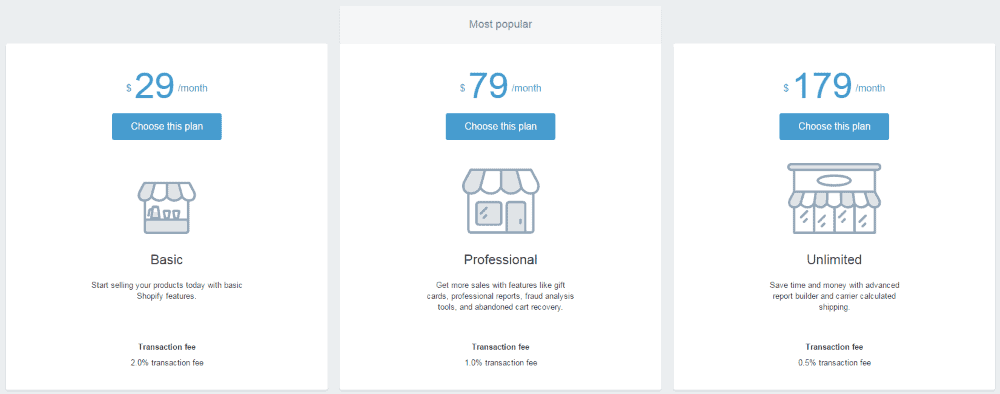
After your 14-day trial is up, you’ll have to select one of the available plans with Shopify to continue operating. The current options are:
And that’s it! Right now, your new eCommerce store on Shopify is up and running. Shopify takes care of all of your products, sales, orders, and the overall appearance of your online store on the web.
So what do you think? Willing to give Shopify a try? Or maybe you have any questions related to how to set up your eCommerce store on Shopify?
