A dropshipping business is simple.
When your store sells an item, the order is sent to a third party (your supplier), who then ships it directly to the shopper. You don’t have to touch the product, and you only pay for what you sell—freeing you from inventory management headaches.
Thanks to solutions like Shopify, it only takes a day or two to launch a dropshipping website, source products, and sell them to the world.
Don’t believe me?
In this guide, you’ll learn all about finding a niche, sourcing products for your market, and the step-by-step process of starting a Shopify dropshipping website—plus, you’ll see examples of successful dropshippers and glimpse the extra tools they’re using to run their businesses.
Why Is Shopify Good for Dropshipping?
While there are several ecommerce solutions out there that can power your dropshipping business, Shopify continues to be one of the most popular platforms for merchants. That’s because Shopify is:
- Dropshipper-friendly. One of the best things about Shopify is that the platform is friendly with solutions specifically made for dropshipping. One example is its flawless integration with Oberlo (read our full Oberlo review), a dropshipping tool that works exclusively with Shopify.
- Packed with great features. Shopify offers all the features you need for building an ecommerce business (not just a website). Plus, in addition to its complete array of native functionalities, you can install a great variety of third-party apps from their marketplace to scale your store.
- Easy to use. Shopify is one of the most user-friendly solutions out there. It may be packed with features and functionalities, but it doesn’t get overwhelming. The company does an excellent job guiding merchants on using its software with guides, blogs, and a help center.
- All-in-one. Shopify removes a lot of the steps required to build an ecommerce business, such as using a web hosting service for your website, dealing with dropshipping suppliers personally, managing inventory source, designing your online store with code, and much more. The barrier of entry for starting a dropshipping business is as low as possible with Shopify.
This means, using Shopify for dropshipping is a smart idea. With all the time and effort you’re saving for yourself, it is painless for anyone to do it.
What You Need Before Starting a Dropshipping Store with Shopify
Given all the benefits of using Shopify for your dropshipping business, the stuff you need in order to launch a store are very few and don’t require much investment or technical skills.
1. A Profitable Niche
The first step to building a dropshipping business is figuring out what you’re selling and who your target customers are. In other words, you need to find a viable niche.
A practical advice is to choose a strong niche that you’re genuinely interested in and has high demand, but that also has opportunities for being competitive so you can make profits.
You need to research a product’s demand, popularity, and profitability. While also focusing your efforts on the areas you’re genuinely interested in.
For example, if you work out and do yoga, you can research the health and fitness space to see what items are selling. Here’s how you can find products and validate their demand:
Figure Out If Your Niche is Profitable
Product popularity is a good sign, but you still want to make profits at the end of the day.
Before you launch your dropshipping business, run the numbers to gauge the profitability of an item. If you include the cost of doing business, shipping fees, marketing, and the cut of your suppliers, running a profitable dropshipping business requires wide and healthy margins (like 70% if not higher).
This means you want to look for low-cost, highly-demanded products that you can sell at premium prices.
For example, You can research the wholesale prices of leggings by running some searches on supplier websites like Oberlo and AliExpress. Based on these websites, the prices for leggings range from around $4 to $11.
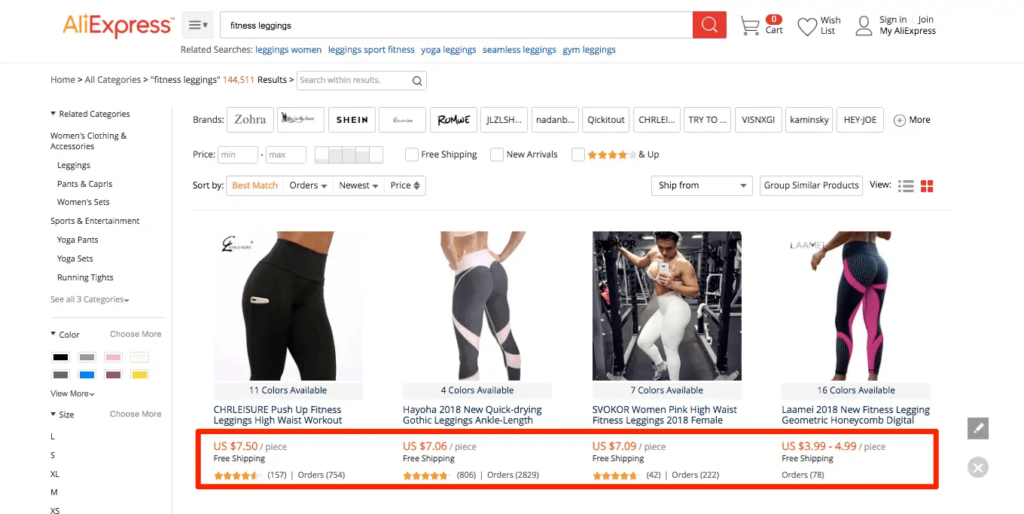
Now, leggings prices can vary a lot. Lululemon’s price range, for example, is from $98 to $148, while lower-end stores such as Target sell leggings at prices ranging from $10 to $21.
In this case, you can sell leggings for $25 or more depending on their quality, which is more than double of the product price. Which means it is profitable.
When following a similar process, you can calculate your profits using Shopify’s Gross Profit Margin Calculator to calculate your gross profits.
Determine Your Target Market
Once you’re clear about your product’s demand and profitability, you need to learn who is buying those products.
For this, you need to do some customer research and ask yourself:
- Where do my ideal customers live?
- What do they do? Who do they follow? What shapes their beliefs and behaviors?
- What do they say on social media? What keywords do they use frequently?
- What are their pains, beliefs, and desires?
- What are their thinking patterns? What triggers them to buy?
- How can you get attention from customers?
- Who are your competitors, and what are they doing to sell their products?
There’s no offer without demand, so it’s essential to know who you are trying to help with your products if you want to truly grow a business.
For the same example, you can go to Instagram and look for relevant hashtags like #newleggings or #yogapants, and see what these customers say, think, or behave about them. There’s a lot of data you can get just by searching a few specific keywords, just like this post:

From that post, you can do a lot. You can reach out to that person and ask her questions about how she got those leggings, what she likes about them, etc. You can also follow the brand that sold those leggings and study how they’re marketing their products.
For example, you can tell that those leggings are for running. So from this quick search, you know:
- You can sell running leggings.
- The type of customer who buys running leggings.
- There’s a competitor that sells running leggings.
Now, this isn’t well-founded data, just an assumption. You need to gather more data to validate that this is a market that’s worth getting into.
Use Software to Validate Your Market
When it comes to customer research, never assume anything. Have chats with potential customers to understand them, use keyword research tools to determine where the demand comes from, and research surveys or studies online that validate your suspicions.
You need data to understand your target audience and validate that your product has a demand. For this, there’re online research tools such as SparkToro or Audiense that you can use to determine:
- Who your audience is following on social media.
- Their demographics.
- The podcasts they listen to.
- Youtube channels they’re subscribed to.
- Websites they visit.
- The words, hashtags, and phrases they constantly use to describe themselves or their problems.
For example, you can use SparkToro to find out how many people are talking about “running leggings” and get to see their (not personal) data. Just like this:
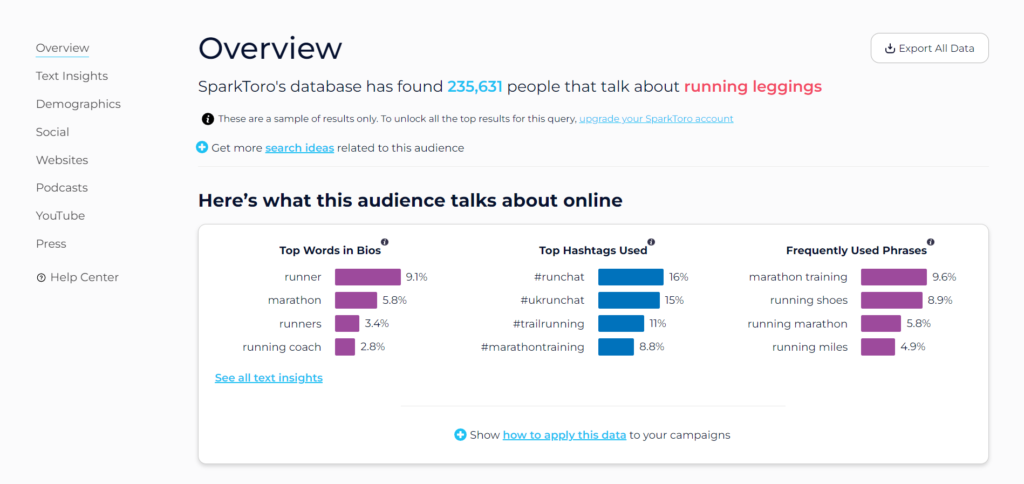
And here’s the exciting part: the initial idea was to sell different types of leggings for fitness women. But with this data, it seems to be a better idea to sell clothes for marathon runners like leggings, shoes, or headbands.
Additionally, if you want to explore subreddits or search questions on Quora to interact directly with your audience, this data can also guide you and tell you where to look for insights.
2. Dropshipping App
A dropshipping app integrates your Shopify store with your supplier’s platform to automatically make orders and fulfill your sales. It is through your dropshipping tools that you will find suppliers and products that are worth selling.
Once you have a prospective niche and a clear idea of the type of products you’re going to sell, choosing the right dropshipping tools is necessary to move forward. You want to find a dropshipping app that:
- Has a great diversity of products in your niche keyword (For example, the keyword “t-shirt” covers almost infinite types of products).
- Integrates with Shopify seamlessly.
- Have a catalog of suppliers located near your target market for a shorter shipping time.
- It fits the sales and marketing channels you plan to use.
- Fulfills orders automatically, or at least makes it easy.
- It gives you access to high-quality products and dropshipping providers that are easy to work with (or who don’t need any communication).
- Allows you to offer a shorter shipping time.
- Supports discounts for seasonal events, triggers, and any other condition.
- Has a clear policy for refunds and returns.
- Let you get product samples and fair offers.
Most apps specialize in a specific niche, platform, or even location. So there’s no one-size-fits-all solution for this. You’ll need to evaluate them based on the criteria above.
Below are the most popular dropshipping apps:
A) Oberlo
Oberlo is a Shopify-owned dropshipping app, so Oberlo’s integration with the platform is as easy and seamless as it can be.
When you navigate to your “Products” menu and click “Find more products to sell,” Shopify automatically takes you to the Oberlo app because it’s the default dropshipping tool.
Some of Oberlo’s key features include:
- Easy import of dropship products straight to your Shopify store.
- Order fulfillment is handled directly by Oberlo, so you never have to touch or manage inventory.
- Get automatic updates of order quantities and pricing directly from your catalog of suppliers.
- Product customization features so you can modify product names, descriptions, and images.
- Automated pricing features for setting up product pricing rules and managing prices in bulk.
- Shipment tracking so you can keep tabs on all orders.
- Multiple users support so you can bring in a team to help you run your store.
- Find existing products that you’re currently selling on Oberlo.
Check our full review on Oberlo app.
Pricing:
There’s a limited free plan for up to 500 products, but it doesn’t include bulk orders, shipment tracking, and other essential features. Then there’s the Boss plan that’s $29/month and has all the features and an almost unlimited product limit.
B) Printful
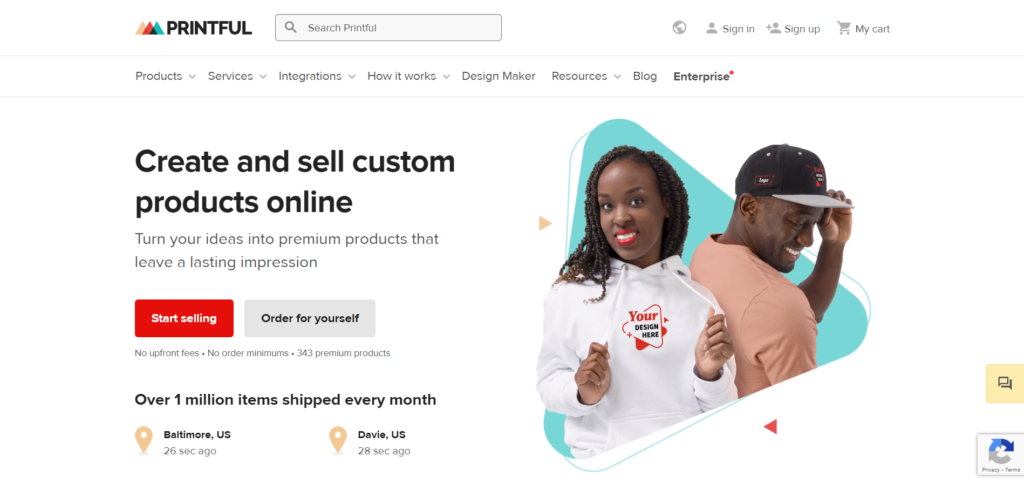
Printful is a dropshipping solution specifically made for businesses that operate on a print-on-demand model. If you’re selling original designs and artwork printed on merchandise like apparel, mugs, and posters, Printful is the solution for you.
Here are Printful’s key features:
- No upfront monthly fees and no inventory costs.
- Automatic and seamless integration with Shopify, all orders are sent directly to Printful for fulfillment.
- Whitelabel service and access to designers and photographers.
- Easily create mockups with Printful’s mockup generator and mockup photos.
- Product photography services, in which they take pro-grade photos that you can upload to your store.
- Printful-owned warehouse and fulfillment facility so you can expect consistency with order quality and fulfillment.
Pricing:
It has no pricing plans. The cost will depend on the product you sell.
C) MODALYST
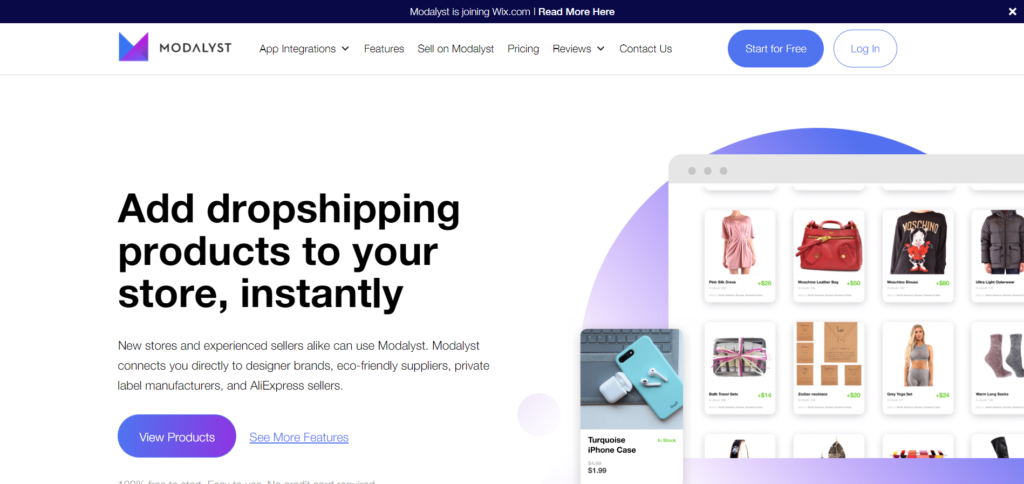
Modalyst is a Shopify dropshipping app that specializes in name brands. They have one of the largest selections of branded products, so it’s a good option if you want to dropship products from known brands.
Here are MODALYST’s key features:
- Four main marketplaces, including:
- Name Brands (Superga, Calvin Klein, Diesel, DSquared, Puma, Lacoste, Cavalli, Moschino, Dolce & Gabanna, etc.)
- Independent Brands (600+ niche vendors.)
- Trendy, Affordable Products (merchandise that focuses on teens and young female customers.)
- Low-Cost Goods (inexpensive drones, gear, apparel, homeware, etc.)
- Centralized supplier and product management, so you can stay on top of orders from one system.
- Quickly add products from the Modalyst marketplace to your store.
- Item name and description editing and customization.
- Automated pricing and inventory syncing.
- Certain dropshipping suppliers offer free shipping service.
Pricing:
There are three plans that offer the same features. The only difference is the number of products you’re allowed to sell. The free plan only offers 25 products, the startup plan ($35/month) offers up to 500 products, and the pro plan ($90/month) has no limits.
D) Spocket
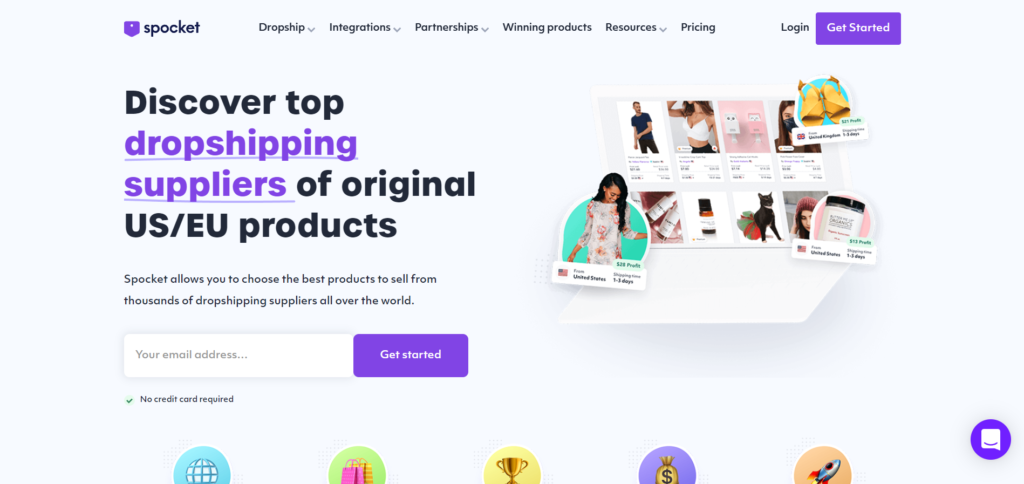
Spocket is great for entrepreneurs who want to source products from global dropshipping providers. This app allows you to purchase products from countries in the United States, Europe, Asia, and Africa. Spocket also boasts discounted merchandise, allowing you to sell at 30% to 60% margins—which is excellent for offering competitive discounts.
Here are Spocket’s key features:
- Over a million vetted products from global suppliers.
- Items are shipped to customers in about 5-7 days, and local orders are shipped in 2-5 days.
- One-click order fulfillment.
- Spocket gives you access to discounted products so you can keep your margins at 30% or higher.
- You can customize your invoices with your logo and branding.
- Inventory syncing for real-time updates of stock levels.
Pricing:
Spocket has multiple plans, going from $25/month for 25 products to $99.99/month for 10,000 products (the free plan only allows you to browse products).
E) Spreadr App
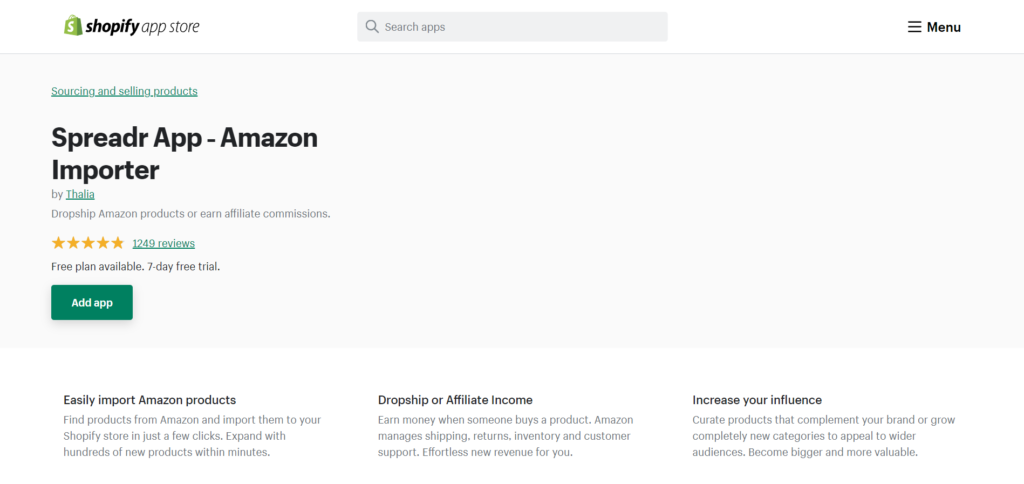
Spreadr allows you to showcase Amazon products on your Shopify store and earn a commission for every completed order. You just need to add products from Amazon by using Spreadr’s import features, which pull items from Amazon to your Shopify store. Your customers can then click the link from your store, then complete the purchase from Amazon, which then fulfills the order.
Spreadr’s key features:
- Simple product import. All you need to do is paste the Amazon product URL onto your Spreadr dashboard, and the app will pull the product using Amazon’s API.
- Amazon products are displayed on your site so that the items follow your store’s look and feel.
- You can edit and tailor the item name and description for your site.
- Product images are stored on your Shopify website, so you can edit and resize as necessary.
- Bulk import features so you can add items by the thousands.
- Automated pricing and inventory syncing so you don’t end up selling out-of-stock items.
Pricing:
$5/month if you only want to import products, and $10/month to include auto-sync.
F) Syncee
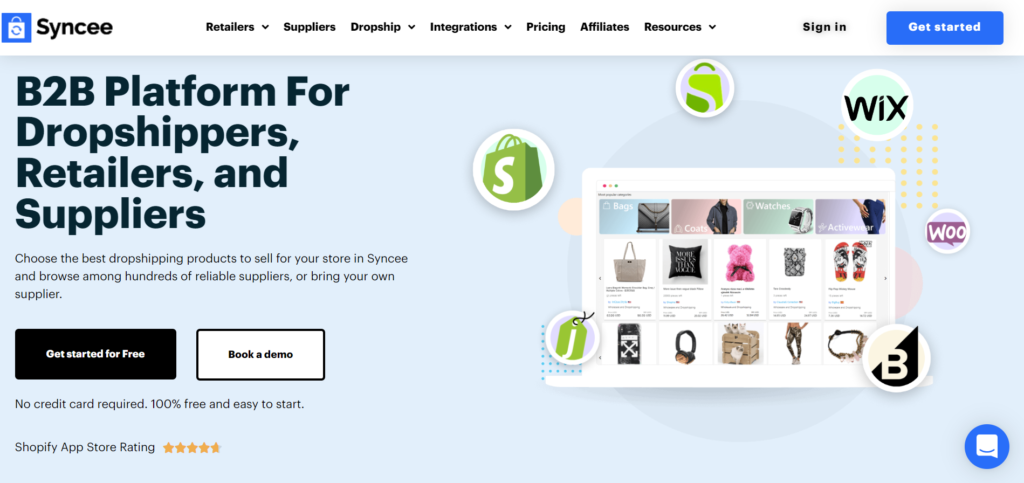
Syncee offers global dropshipping with suppliers from all over the world, including the UK, Australia, EU, China, Canada, and the U.S.
You can readily use it with your Shopify store and start selling high-quality products everywhere without compromising shipping details like fees or delays.
And what’s better, it has a free starter plan with which you can sell up to 25 products.
Key features:
- More than 4 million products to sell.
- Automated tasks such as order fulfillment and updates.
- Professional and pre-vetted catalog of suppliers.
- Supports dynamic pricing rules.
- Smart product search feature.
- You can communicate with suppliers within the app.
- Faster shipping service with local suppliers.
Pricing:
There’s a free plan that allows you to sell up to 25 products. But if you need to scale more than that, the basic plan costs $29/month and it will drastically increase that number to 500 and remove transaction fees. After that, the other plans only offer more products, with the most expensive plan allowing up to 30,000 products for $129/month.
3. High-Quality Products
Once you’ve chosen a dropshipping app, it all comes down to finding products that have demand and are valuable for your target audience.
For this, a product needs to fit some requirements:
- It’s actively demanded by your audience (they’re searched and asked for on social media).
- It’s made with high-quality material, so it’s durable and attractive.
- The supplier and the products must have a good reputation. Most dropshipping tools allow you to review your suppliers so other vendors can know who are the most responsible and reliable partners.
- It stands out from the competition with unique features or particular advantages.
- The competition is either low, incompetent, or has a gap.
- It has better shipping service.
There are online research tools and channels you can leverage to import a variety of products, including:
Keyword Research
Start by making a list of product keywords in your prospective niche, such as “running leggings” and “marathon clothes.”
You can use an SEO tool like Ahrefs or Moz to see their monthly search volume and find similar alternatives. Keywords Everywhere is an ideal tool to find interesting keywords:
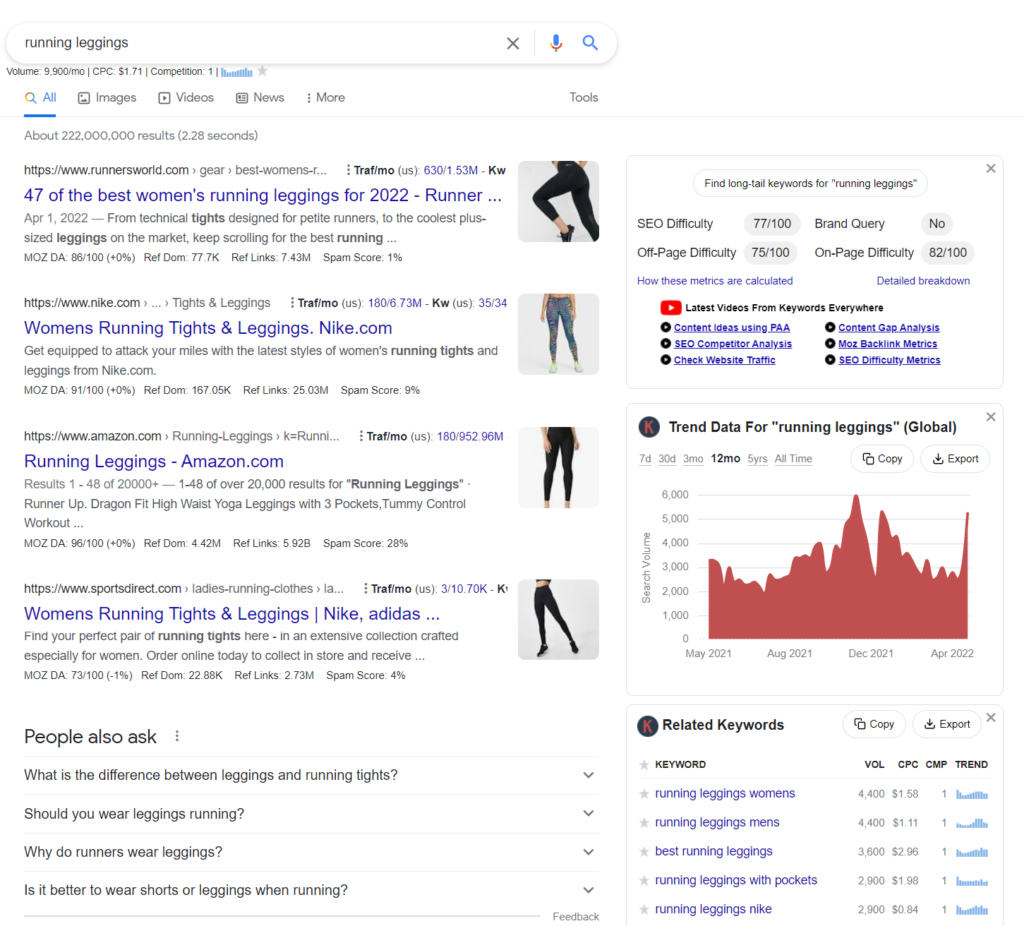
You’ll find which genders, brands, or sizes have the most monthly searches. In this case, “winter running leggings,” “high waisted running leggings,” and “running leggings with pockets” had very healthy search volumes, which means you could safely include them in your store.
Finding Product Trends
Getting keyword data is helpful, but you also need to combine that with trend data to determine if an item is gaining popularity.
With Google Trends, you can enter keywords to figure out their search popularity over the last several years.
For example, you can compare the popularity of “black running leggings” against “blue running leggings.”
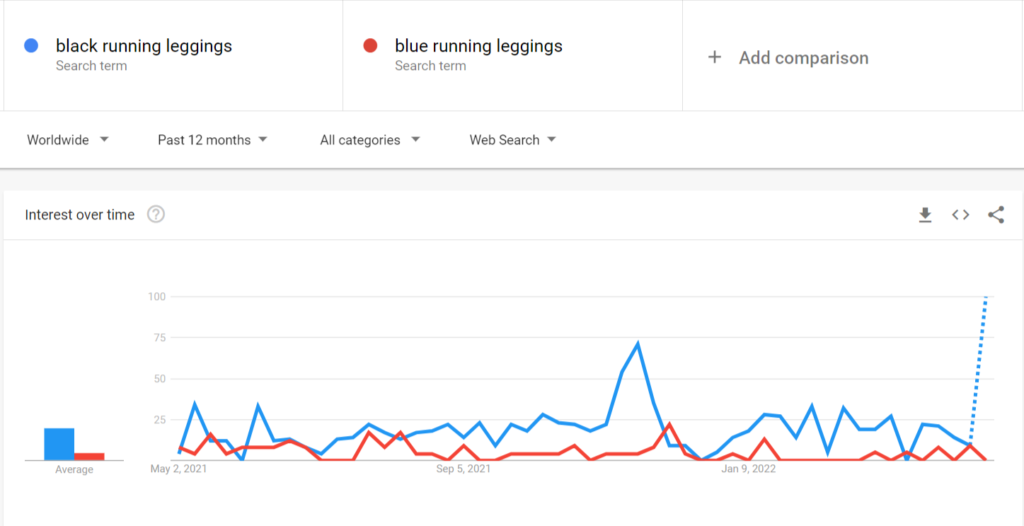
Keep this in mind when you’re looking for product ideas. Enter your keywords into Google trends to determine whether a product is trending up or down.
Social Media Platforms
You can always hang around social platforms such as Instagram or Pinterest to spot new trends, hashtags, campaigns, etc.
For example, you can come back to Instagram and start searching for more types of leggings and see how much engagement they get. Look at shoppable posts featuring items for sale and see if there are people in the comments asking about availability, shipping details, or how the product works.
In case you don’t have time to research manually, you can also use a social listening tool like Hootsuite, SproutSocial, BuzzSumo, or Mention to gather valuable data such as the volume of people talking about “marathon clothes” or spot conversations about the next event.
4. A Shopify Store
Once you have the solid foundations for your dropshipping business, all it’s left to do is open your store with Shopify.
Shopify makes it easy to create a website and sell products online. So it’s naturally one if not the best, platform to launch a dropshipping business as fast as possible.
What’s even more remarkable about Shopify is that the installation process is way more straightforward than other platforms—and it does it without sacrificing features or essential functionalities.
The following section will cover the whole process of launching a dropshipping business with Shopify.
How to Build a Shopify Store and Start Dropshipping (Step by Step)
Step 1: Create a Shopify Account
First things first, register an account with Shopify. Head to their website, and click “Get Started” to begin the installation process. When doing this, it’s best to have a store name in mind, as that’s the first thing required to set up an account.

Shopify will ask for a bit more information, such as whether you’re already selling a product and what your physical address is. Once you’ve entered your details, the platform will take you to your store’s backend.
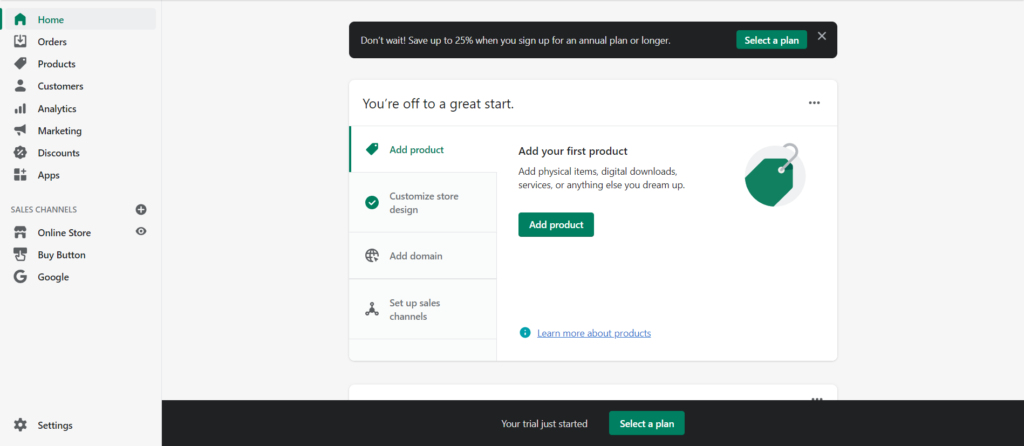
The URL for your Shopify backend follows this format:
“YOUR-STORE-NAME.myshopify.com/admin”
Shopify will send you an email with your store URL, so bookmark that page for easy access.
Step 2: Add Products
Once you’ve set up your account, you’ll see your dashboard. You can do several things at this point—you can choose to design your store, set up your domain name, or add products, among other things.
Simply start by adding products to your store. There’re a few reasons you want to start with this:
- It gets you into the process of store creation. When you’re dropshipping with Shopify, adding products can take minutes. The simplicity of the whole experience eases you into the process of creating your store and builds your momentum.
- It will make the design stage simpler. Building a site around existing products is far easier than starting from scratch. When it’s time to pick themes and templates, you won’t have to imagine what your store would look like with its products, since you already took the time to add items to your shop.
Adding Products From Your Dropshipping App
With Oberlo, for example, adding dozens of dropshipping products is incredibly easy. Here’s how:
- From your dashboard, click “Products” on the left-hand side.
- Select “More actions,” then click “Find more products to sell.”
- You’ll see Oberlo’s interface, where you can search for products and AliExpress suppliers. Enter your keywords into the search bar.
- Go through the results until you find the products that fit your criteria, then select the items you want to add. Do this by clicking the “Select product” button.
- Then on the product page, you’ll see the supply and shipping details, along with a field in which you need to enter your retail price (depending on your pricing strategy). Click “Add product” when you’re done, and Oberlo will add the item to your Shopify store.
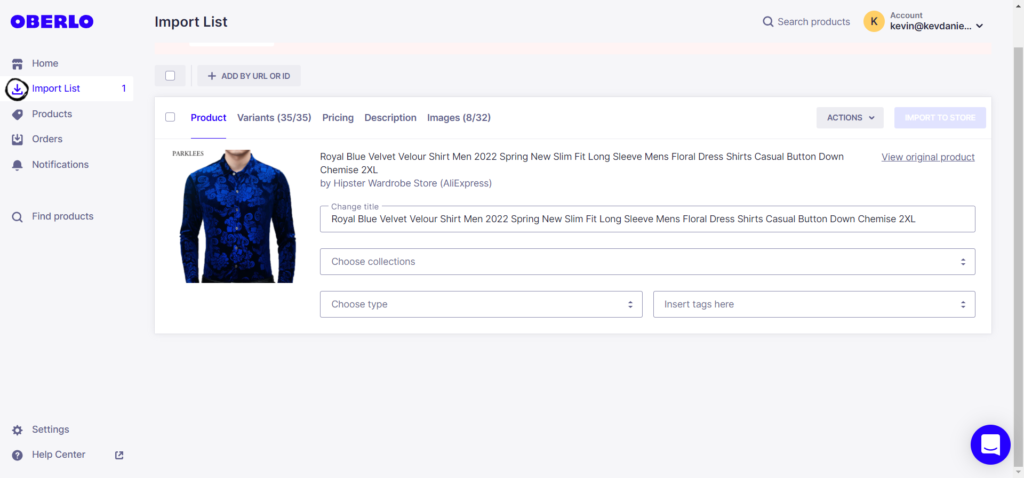
Note: Keep in mind that Oberlo is the default dropshipping app on Shopify, but you can always select a different solution through the Shopify marketplace. The importing process isn’t too different.
Editing Product Details
When you’re done adding products from Oberlo, navigate back to the products section of your store. You should now see all the items you’ve added from Oberlo.
Go through each product and edit their details. Default product titles and descriptions are often stuffed with keywords, and you need to modify these details for your shop if you don’t want to scare visitors away.
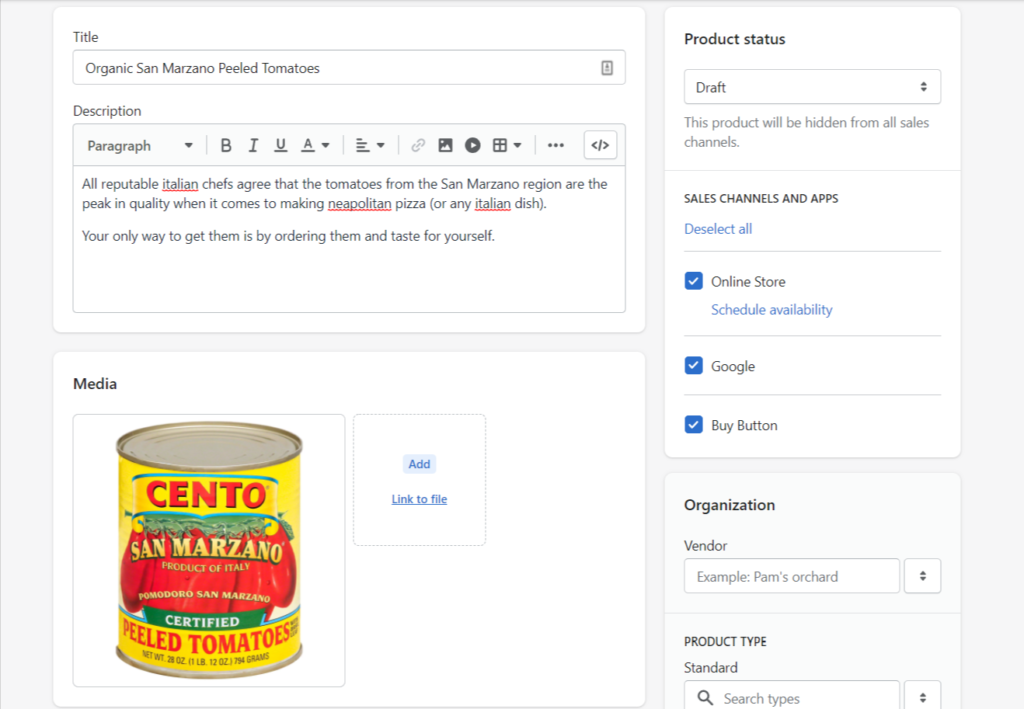
For best results, add some personality and copywriting flair to make a product description that sell.
You should also take this opportunity to add product tags. You can use tags to label products so you can categorize them. For instance, if you’re selling apparel, then your tags could include “summer,” “fall,” “tops,” “dresses,” etc.
There are a couple of ways to add product tags. The first is to do it individually for each product. But, you can also use the bulk product editor to add tags in bulk on your product list. Select the items you want to tag, click the “Actions” dropdown, and click “Add tags.”
Setting up Your Collections
Think of product collections as product groups that allow your customers to find items according to their type, category, etc. There are many types of product collections you can create, such as:
- Products on sale
- Type of product (dresses, shirts, outerwear, etc.)
- Customer type (men, women, kids)
- Product color
For the marathon clothing store example, you could create product categories for “Women,” “Men,” “Best for Summer,” “Best for Winter,” and so on.
To add a collection, click on “Products” on your left-hand navigation and then click “Collections.” From there, click the “Create Collection” button, and you’ll arrive at a page on which you can enter the Collection name and add a description.
Collections can either be manual or automatic.
Manual product collections include only the products that you choose individually. Because of this, the collection always contains the same products unless you specifically add or remove products—this collection type takes more effort to maintain, and it works best if you have a small, curated catalog.
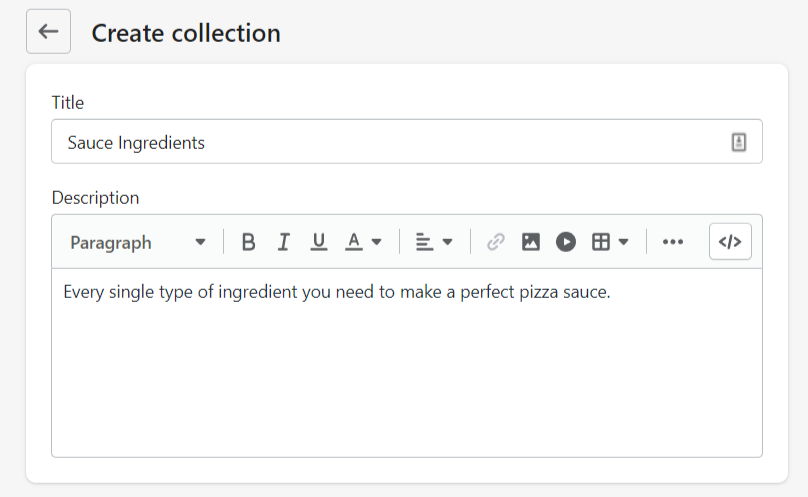
Automated product collections use selection conditions to include matching products automatically. You can, for example, set up a collection so that it automatically includes products that have the “on sale” tag. Or you can set it up so that all products from a particular supplier end up in that collection.
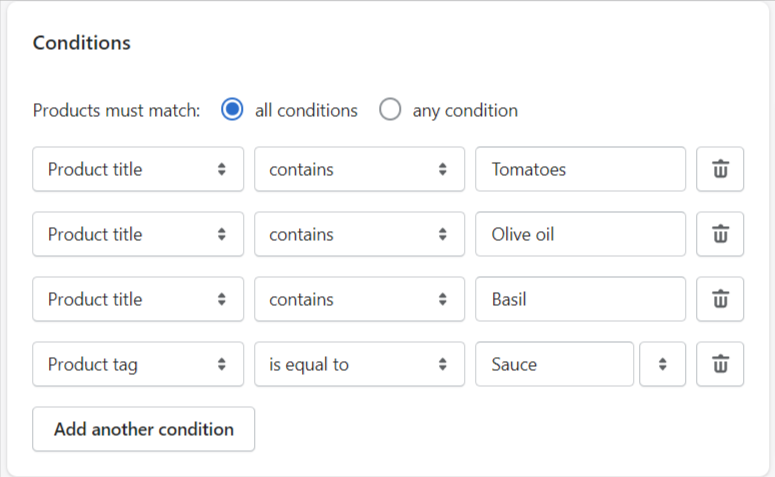
There’s no right or wrong way to create a collection, as this depends on your types of products and store.
Step 3: Set Up and Design Your Store
Once you’ve set up all your products, you can move on to designing your store. Here are the couple of steps required to build your online storefront:
Choose a Theme
Depending on your budget, you can choose one of Shopify’s free themes or find a premium theme at the marketplace.
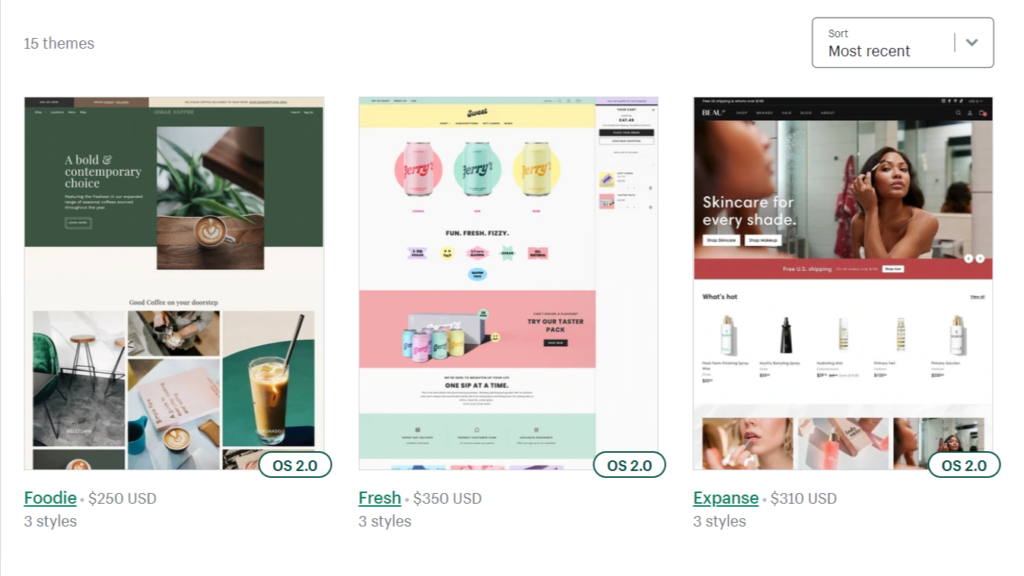
If you truly want your website to stand out, you’ll likely need to purchase a premium theme. And the reason is simple, premium themes are often more flexible, they get regularly updated, and the designs are often cleaner and crispier (if that’s what you’re looking for).
Choosing the best theme for your website doesn’t have to take much thought. Just look for a theme that fits your niche keyword, branding, and ideas, then stick to it—there’s no such thing as the “right” theme, just the one you like.
Customize the Look and Feel of Your Site
In your theme designer, you can edit the look and feel of your online store.
The specifics of this stage will vary depending on your theme of choice. If your theme has a header, for example, then you can upload a logo and customize its size and positioning on your site. If your theme has a slideshow, you’ll need to add images for each slide.
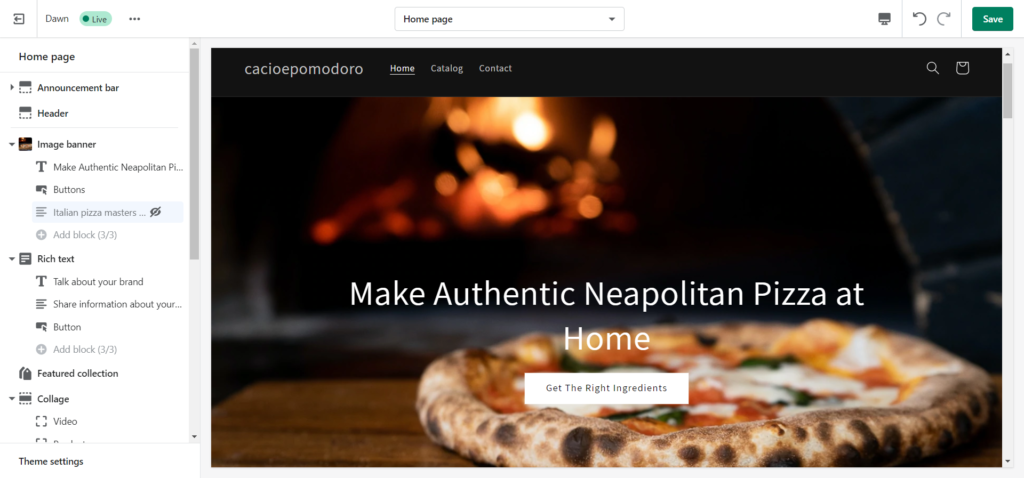
You can customize more general theme settings, including the layout of your site, colors, typography, favicon, social media, and checkout page. Play around with different options and see what works best for you.
Add Pages
The next thing you need to do is create pages for your site. These could include your:
- About page
- Contact page
- Shipping details & returns
- FAQ
To create a page, click the “Pages” link on the left-hand menu of your Shopify backend, then click “Add Page.”
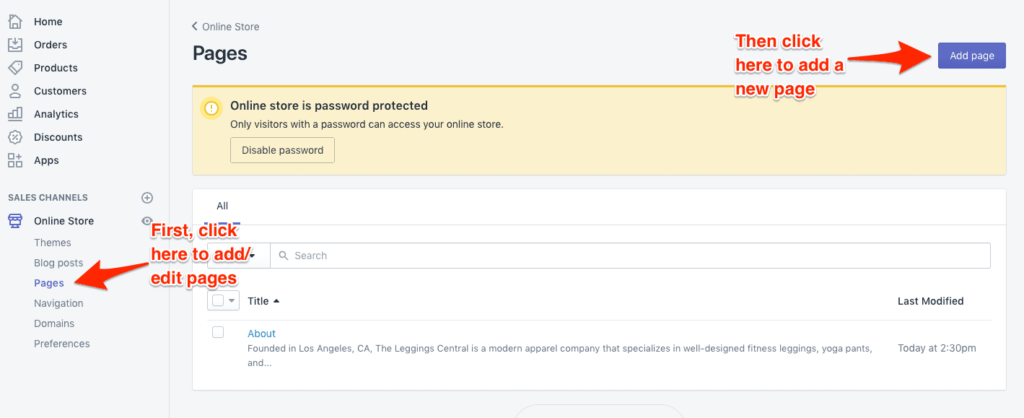
Enter the title of the page you want to create and the copy to go with it. If you’re well-versed in SEO, you can change the meta title, description, URL, and handle, so you can specify what you want search engines to see.
For a basic store, you want a homepage, an about page, category pages, product pages, policies/terms and service pages, and a contact page. You can add more as you expand your business.
Set Up Your Navigation
Once your pages and collections are set up, you can move to your navigation settings. At this stage, you’re going to specify which pages or collections would appear on your main menus.
Think about how you want visitors to navigate your website. What product categories and information do you want them to find? And how can you make it as easy as possible to find the right product?
That’s why it’s a great idea to have a drop down menu where you can access product categories, about pages, blogs, and more with one click. And leave the less essential pages like the return policy and FAQs in the footer.
Follow a similar process for your store. Take time to figure out which pages or links should appear on your menu, and which ones to place on your footer. And once you have this mapped out, follow these additional steps to set up your site navigation.
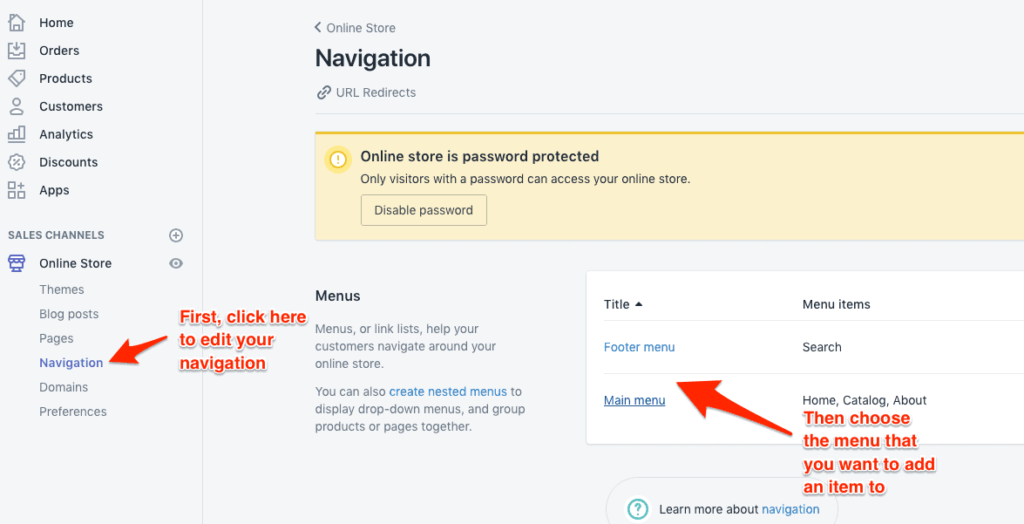
- Click “Navigation” on the left-hand menu of the dashboard.
- Select the menu to which you want to add an item (i.e., link, page, collection, etc.)
- On the menu page, Click “Add menu item.”
- Enter a name for your item, then in the “Link” field, select the relevant item from the list of pages, collections, or products that you’ve already set up.
If you’re stuck, check these 25 Shopify store examples to find inspiration.
Step 4: Set up payments
You can find your site’s payment settings by clicking “Settings” on the left-hand menu, then clicking “Payment Providers.”
Shopify provides many options to get paid. They include:
- Shopify Payments. Which is the default payment option and is fully integrated with the platform. Allows your customers to pay with any major credit card.
- Paypal. Shopify automatically sets up a business Paypal account when you create your store, and conveniently, it also allows you to accept Paypal payments.
- Third-party payment providers. If Shopify Payments isn’t convenient for you, you can use any of the 100 third-party payment providers available. Keep in mind that Shopify will charge a transaction fee when using them.
- Manual payments. It gives the option to make payments with bank deposits, cash on delivery, external credit, gift cards, etc.
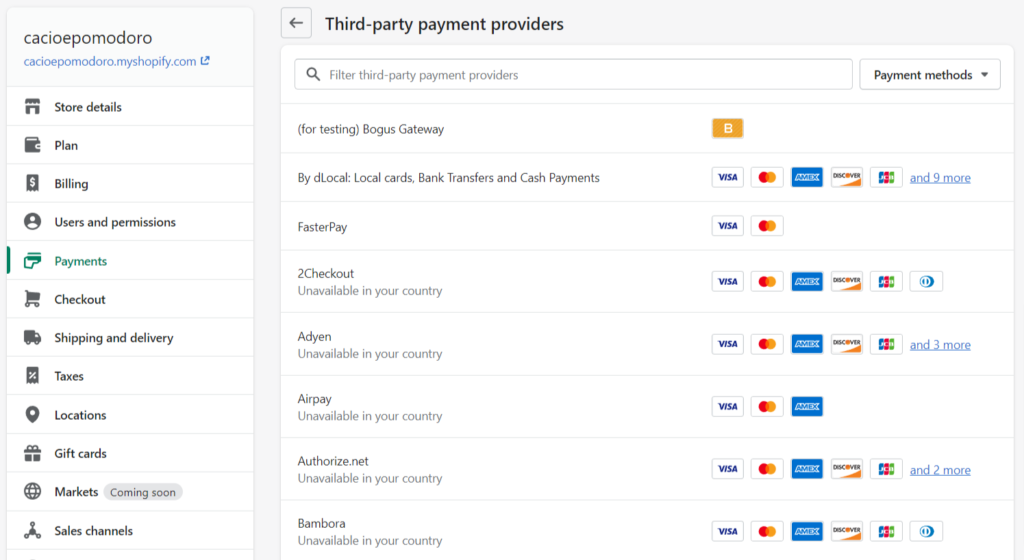
Note that while Shopify Payments is enabled, Shopify will only be able to transfer funds to your bank account after you’ve completed your account set up and provided additional details. As for PayPal, the company will email you after making your first sale with instructions on how to set up a PayPal Merchant account.
As for transaction fees, they can range from 2.9%+30¢ USD to 2.4%+30¢ USD depending on your plan.
Step 5: Optimize Your Store’s Settings, Policies, and Rules
It’s easy to miss out on essential details such as refund policies or terms and conditions. So before launching your website right away and dealing with those problems when you least want it, take a moment to go over your store’s settings and make sure that everything is set up correctly to your needs.
Then, you want to cover all the required policies to avoid any legal issues. Shopify has good guides on creating standard privacy policies, refund policies, and terms and conditions for your store—use them.
Another important detail, for example, is to make sure you’re offering free shipping for any shipping destination. One of the main causes of cart abandonment is the additional costs, so ensuring that your customer only pays what’s shown on the product page is a must-have.
Simply add your shipping rates to your product prices regardless of your supplier and make it dynamic (decrease the costs when shipping rates are down, and increase them when they go up).
Once you’re done going over your store’s settings, you can start launching your business.
Step 6: Select a Paid Plan and Launch Your Business
Shopify’s 14-day free trial lets you explore most of the platform’s features and lets you add products, design a store, install Shopify tools, and more. However, you won’t be able to sell products or services until you choose a paid monthly plan.
If you’re ready to open your site to the world and earn revenue, then there are a few additional steps left before starting to sell.
Select a Plan for Your Business
Here’s the official Shopify pricing table for the premium plans:
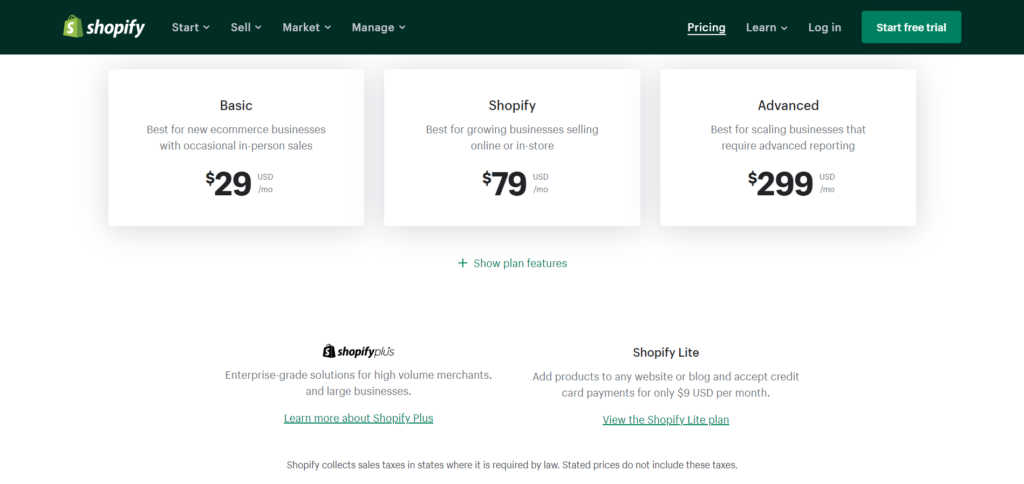
The difference between these plans revolves mostly around the analytics and reports features. Whether the price gap between these plans is worth the extra cost depends on how valuable it can be for your dropshipping business to have native analytics data.
If you’re wondering which is the best plan to start with, the basic $29/month plan will offer everything you need to set up a 100% functional online store. You’ll naturally upgrade your plan as your business grows and you need to get more data.
However, if you have the experience and you’re building a very particular business. Then you’d be more likely to choose a more advanced plan from the start in order to grow more quickly.
Add a Custom Domain to Your Website
Without a proper domain set up, your store’s default URL will be “https://YOUR-STORE-NAME.myshopify.com/”
And while it’s technically possible to run your store without a custom URL, having your domain name will help your store appear much more professional and appealing.
Fortunately, adding a domain is easy with Shopify once you have purchased a plan. You can find your domain settings under “Online Store” on the left-hand menu of your Shopify dashboard.
You’re given three options for domain name registration:
- Connect a third-party domain to Shopify. If you already use a domain registrar (i.e., through a provider like Bluehost, Hostgator, GoDaddy, etc.), you can connect it with Shopify, so the system points your domain name to your Shopify store. The installation process will vary depending on your domain registrar, so check with your vendor or visit Shopify’s help page on the topic.
- Transfer a domain to Shopify. You can also transfer a domain name to Shopify, in which case you will be able to manage, pay for, and renew your domain directly from your Shopify account. Do note that Shopify and your domain registrar may have guidelines on how to do this, so check with both platforms to ensure that you can transfer your domain.
- Purchase a new domain. Don’t have a domain yet? You can buy one through Shopify. Custom domain prices start at $11 per year for a “.com”.
Launch Your Business and Start Selling
With a paid plan and a custom domain, you can finally start selling your dropshipping items and get revenue for your business.
You will spend at least 75% of your work on marketing your products with ads, SEO, social media, or content marketing.
You can start optimizing your website’s conversion rates, build a sales funnel, try using chatbots to increase engagement and any other strategy that works for your business and—more importantly—your target market.
Dropshipping is mostly about iterating which products work for the market, so the other half of your time should be spent on removing products that aren’t worth marketing and finding more profitable products.
Building a business is not easy, the learning curve is steep. So you better be prepared to learn a lot more about ecommerce with our guides.
5 Tips for Running a Dropshipping Store After Launch
You can start a dropshipping website on Shopify in a few hours. But driving traffic and sales consistently requires showing up every day and doing the work.
Despite dropshipping being relatively hands-off because you won’t have to manage physical inventory, certain tasks still require involvement from yourself or your team.
So here are some tips on how to run your business after launching it:
1. Make Use of Third-Party Apps
Most of the convenience of using Shopify is the sheer number of third-party apps that are available in the Shopify marketplace.
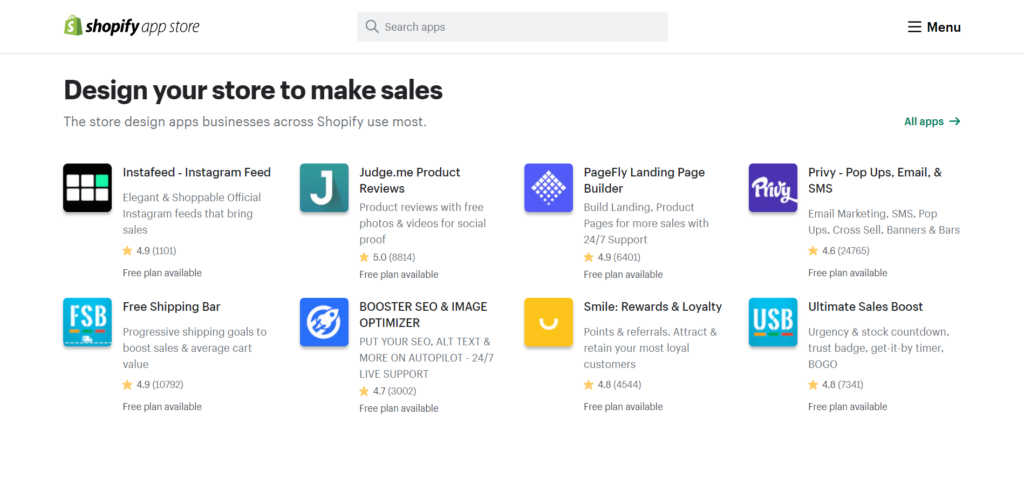
Third-party tools allow store owners to fully customize their business workflows, add more essential features, and offer more value to your customer base. Plus you can easily find them in Shopify’s app store and search for anything you need.
The reason why 80% of Shopify merchants have installed third-party apps is simple: there are essential tools that you’ll need if you want to grow your store. Some of them include:
- Email automation tools such as Klaviyo for sending newsletters, creating automated flows and autoresponders, sending marketing campaigns, and segmenting your audience.
- Remarketing tools such as Shoelace create retargeting ads specially designed to trigger sales from your customer base.
- A CRM to manage your relationship with customers and implement a sales team.
- Social selling apps bring your products to Facebook and Instagram to sell on their platforms.
If you’re serious about launching a competitive dropshipping business, make sure you’re leveraging all the extra tools at your disposal—including those that aren’t native to the platform—so you can run your business more effectively and save time.
2. Manage Relationships with Suppliers and Dropship Vendors
If you’re using solutions such as Oberlo and Spocket, then you likely won’t have to deal with random suppliers, as you can add products to your Shopify through the apps themselves.
In some cases, direct communication with your vendors is necessary.
For instance, if you want your custom logo to be on the products you’re selling, you’ll need to facilitate that with your manufacturers. Or, if you’re not keen on using the default supplier stock image and want your vendor to take customized photos, you’ll need to work closely with them to obtain the pictures you like.
Solutions such as Printful, for example, offer ecommerce photography services in which they print and photograph your products in their facility.
Figure out if vendor communication is required in your business, and stay on top of things by responding promptly and keeping communication channels open.
3. Consider What will Happen with Returns and Refunds
Product returns come with the territory of running an ecommerce business. \
Specific return policies may vary depending on the supplier and your dropshipping vendor. On Oberlo, for example, AliExpress suppliers generally “do not accept returns,” and refunds are issued in cases such as incorrect or damaged items, poor quality merchandise, missing orders, and expired delivery estimates.
But at Modalyst, retailers are required to provide a 14-day return policy, in which case you would need to message the supplier. As for who pays for the returned item, Modalyst says that “in cases where the customer simply wants to return a product without any legitimate issues with the product itself, you or your customer would be responsible for the return shipping fees. However, if the item you received was damaged or didn’t match the description on Modalyst, it is fair to request that the Supplier pays for the shipping fees.”
To figure out the best way to deal with returns, check with your dropshipping providers, then craft your return policy accordingly. Here’s a free return policy generator that you can start with.
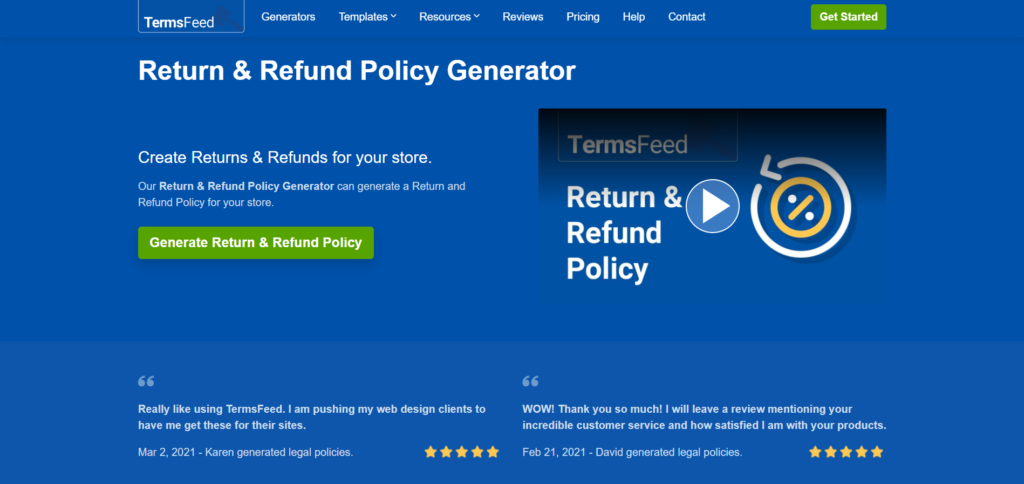
Just enter your company and website information and Shopify will generate a return policy for you.
4. Provide Customer Support
While the dropshipping business model allows you to outsource inventory management and fulfillment, you still need to deal with customer service.
Be prepared to answer product questions, and make sure you’re ready to deal with order issues (e.g., damaged products, delayed shipments, unsatisfied shoppers, etc.).
You should have at least:
- An email address that shoppers can use for their inquiries.
- FAQ section.
- Live chat or phone support.
- A presence on social media where you can stay on top of comments and respond to direct messages promptly.
Not being there for your customers will add an unnecessary barrier and interrupt your sales. So you better make it easy for your prospects to communicate with you.
5. Invest Heavily in Marketing
One of the advantages of dropshipping is being able to focus on marketing your business.
So after launching your store, it is crucial to focus on at least a few of these marketing channels:
- Facebook advertising. There’s a good chance that your customer base is on Facebook or Instagram. There are a ton of people that can be exposed to your brand with a Facebook Ads account. Therefore, you should learn how to use Facebook Ads.
- Google AdWords. As the go-to search engine for most consumers, Google’s advertising solutions enable you to reach people who are actively searching for your products. You can place ads on keywords with high monthly search volume and create ads to match the searcher’s intent. You could also set up a Google Shopping Campaign, which involves creating shopping ads that “show users a photo of your product, plus a title, price, store name, and more.”
So, for more info on how to run a successful Google AdWords campaign, check out their Merchant Center.
- SEO. Optimizing your site for search engines is a way to get (almost) free traffic. Note that SEO takes several months of work to rank your site effectively for valuable keywords, so it is wise to learn SEO for online stores. But if you’re not an SEO pro, you’re better off hiring an ecommerce SEO consultant who can strategize and do the heavy lifting for you.
- Influencer marketing. Influencers can be a big deal for ecommerce merchants, as working with individuals who have amassed a wide following can put your products and brands in front of new audiences. However, it’s essential to learn how to identify the right influencers for your brand, so you get a real return on your investment (which is covered in this influencer marketing guide.)
- Email marketing. Collecting your prospect’s emails is vital to growing a healthy customer base. With an email list, you can send newsletters, offers, and educational content to your audience and build relationships with customers. You can always head to the Shopify app store and install an email marketing software that can help you create automated email campaigns and make sales while you sleep.
- Content marketing. Content marketing helps differentiate your brand, position your company as an authority in your space, and boost your SEO rankings—it just takes time. You can start by creating high-value resources that educate, inform, and entertain your target market. Also, figure out your audience’s topics, questions, and concerns, then come up with relevant articles, tools, and other content pieces to address those needs (just look at content marketing examples for inspiration). Content will take a lot of time, but it can pay off really well in the long term.
Your sales will be proportional to the time and money you invest in marketing. It’s easy to get distracted with other tasks, but your business won’t get far if you don’t set a time every day to invest in marketing—it is a non-negotiable.
4 Examples of Successful Dropshipping Stores Using Shopify
Whether you’re thinking about dropshipping or you already have a business up and running, it’s always inspiring to see what successful stores are doing. Here are some Shopify dropshipping success stories:
1. The Philosopher’s Shirt
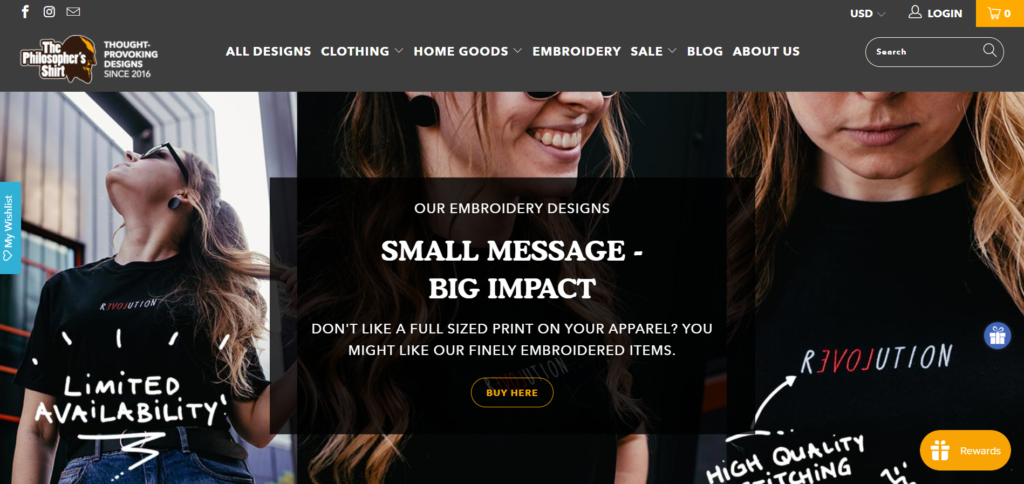
This store sells t-shirts and other products for philosophy enthusiasts. Using Printful to include quotes, jokes, and anything related to philosophy in their merchandise.
Although it feels easy to replicate this business model, it definitely isn’t. As Markus (a founder) said to Printful, “the cake was already eaten” since the competition was already stiff.
However, they ultimately found success because:
- They picked high-quality products over cheap Chinese suppliers.
- They learned how to use paid ads to target their specific audience using Facebook ads, Tik Tok, Instagram, and Pinterest.
- They invested in offering excellent customer service, showing that there are “people” behind the business. Replying to customer questions, sending newsletters, posting memes, and interacting with their customers base was key.
- They targeted a particular audience that included philosophy students and professors. They know you can’t please everybody, so they stick with the people that they already engage.
2. Eliot Grey
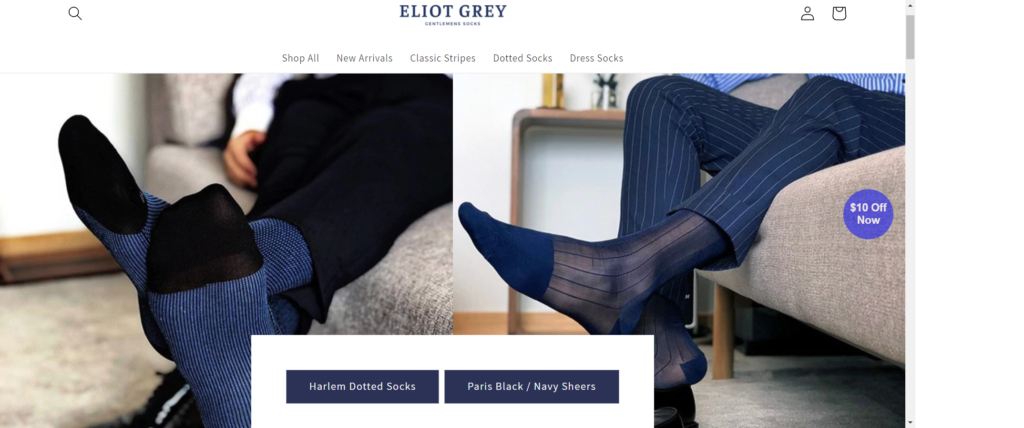
Eliot Grey is a men’s boutique that features “the very best in classic accessories for The Man Of Distinction.” The store sells shoes, socks, ties, cufflinks, underwear, etc.
Ran Moore, the owner of Eliot Grey, shared his story with Oberlo, saying that he started the site in 2017 after suffering from a heart attack. He needed to find a way to earn money while working from home, and he started his ecommerce that same year by selling various men’s fashion products online.
He continued to explore products and said he came across a leather coat that perfectly captured the look of his shop. So, he added it to his store, invested the time to write a great product description, and then shared the product on a men’s Facebook Group.
“Next thing I know, I’m sitting at home, and a notification popped up. I checked it and practically leaped from my chair in shock. I had made my first sale! It took me two weeks after opening to make my first sale,” he told Oberlo.
As of today, the store focuses on selling luxury socks for men and has only grown since then.
3. Marigold Shadows
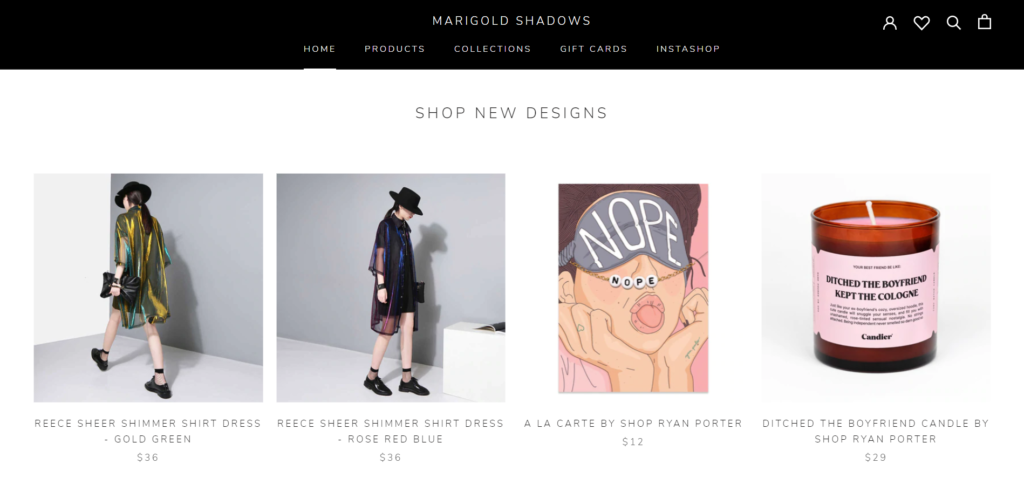
Zoe Abel, the founder of this store, sold her three fashion businesses to build a clothing store with her own designs.
She used Shopify to build her store in a few weeks, as she said to Oberlo: “I took my time building it and didn’t advertise it for a while.”
Her main advice is to recognize that your customers are not who you might think, and you must learn about your target customers as soon as possible. Plus, it also helps a lot to sell products you’re genuinely interested in, as Zoe was willing to sell three businesses in order to run a store she would be passionate about.
Or, as she said: “When I started selling my own designs that I liked, running a store felt less like work, and sales came faster.”
You can visit Marigold Shadows, check her collections, and learn how a successful business looks like.
4. Creative Action Network
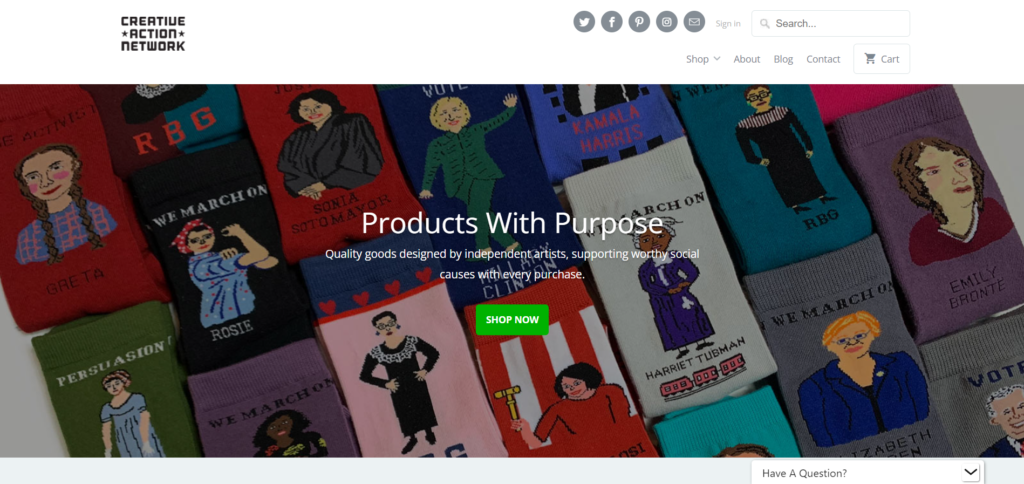
Creative Action Network is “a community of artists and advocates making art with purpose.” They implement crowdsourced campaigns around particular causes and invite people to contribute with their own designs.
The Creative Action Network then develops those designs into physical goods (like apparel and homeware) and sells the products online and to retailers from all over the US.
Its website uses Shopify and Printful to run a dropshipping business. Aaron Perry-Zucker—the co-founder and Chief Creative Officer of the organization—told The Abundant Artist that they started by printing posters on-demand using printers in their studio.
According to him, the process was tedious and hard to scale, so they decided to try Printful.
Doing so allowed them to outsource and automate the order fulfillment side of their operations so they could scale. That decision paid dividends. Aaron said that their “numbers shot up ten-fold across the board.”
He also commended Printful’s customer support saying, “They’re a small team, which means you can always talk to someone and get a personalized solution versus working with a big, faceless company.”
After all these years, this store is still running and growing healthier.
FAQ
Do You Need a Business License to Dropship?
Not at all. Since the installation process is straightforward, you don’t need to go through any legal process to get started—until you’re making serious revenue.
All it takes is to create your website with Shopify, import products, and start selling.
How Much Can You Make with Dropshipping?
You can find endless success stories in Oberlo’s blog of entrepreneurs making up to $10 million a year with dropshipping.
But without counting those cases, it is possible to make around $1,000-$5,000 a month in profits with dropshipping, given that you’re doing it well and haven’t scaled that much yet.
How Long Does it Take to Make Money Dropshipping?
Depending on your niche and how good you’re at choosing products, it might take as little as one week to get your first dollar from dropshipping (given that you’ve made a decent upfront investment).
On the other end, it might also take several months to see profits if you’re not good at marketing and sales or if you waste too much time selling the wrong products.
Is Dropshipping with Shopify Legal?
Dropshipping is entirely legal in all countries, and there’s no restriction on how much you can sell or make with it.
Where Can You Buy a Shopify Dropshipping Business?
If you don’t want to create a dropshipping business from scratch, you can buy an existing dropshipping business from Shopify’s Exchange website. Exchange is essentially a marketplace where entrepreneurs offer their ecommerce businesses for sale to interested buyers.
Through Exchange, you can see crucial details like traffic and revenue data for any potential dropshipping business. Once you’re satisfied with the information, you can contact the seller directly within the product listing using the messaging system available to Exchange visitors.
With over 9,000 ecommerce stores for sale, you are likely to find something that suits your needs.
Why Dropshipping Businesses Fail?
There are many reasons why dropshipping businesses tend to fail often:
- They enter a tough niche without any competitive advantage.
- They slow down or invest too little in marketing.
- They fail to match their products with the target market.
- They invest little in branding.
- Slow websites with sloppy designs and non-intuitive user experience.
- Bad relationships with customers.
Dropshipping only brings profit when you find a demand gap in your market that you can fulfill with good products (and building trust with customers). Or else, your margins will tend to be so tight that you’ll need to sell too many products to get any return.
Is Dropshipping with Shopify Worth it in 2022?
Yes, dropshipping with Shopify will always be a great option to get started in the ecommerce space with very little investment.
The dropshipping market is still evolving as people move away from low-quality sources like AliExpress. They start using platforms that make it easier to find high-quality suppliers with faster shipping service, which means there will always be an opportunity to sell products online.
Dropshipping Makes Ecommerce Easy, with Shopify It’s Even Easier
Starting a dropshipping business with Shopify is surprisingly easy and requires little upfront investment. Here’s all you need to do in a nutshell:
Find a product with demand, create a site using Shopify’s easy-to-use platform, and experiment with different marketing methods until you hit the nail.
When all these steps are implemented correctly, you’ll be able to run a profitable dropshipping business in weeks or months—depending on your luck.
Dropshipping with Shopify is the fastest way to get started in the ecommerce world. So create your online store before you lose the momentum!
